버츄얼 디바이스 켜기
1. 데이터 저장과 관리2
Database1_CURD2 프로젝트 만들기
Device File Explorer - data - data 에서 해당 프로젝트의 DB 파일 얻을 수 있다.
- activity_main.xml
<androidx.constraintlayout.widget.ConstraintLayout xmlns:android="http://schemas.android.com/apk/res/android"
    xmlns:app="http://schemas.android.com/apk/res-auto"
    xmlns:tools="http://schemas.android.com/tools"
    android:layout_width="match_parent"
    android:layout_height="match_parent">

    <EditText
        android:id="@+id/name"
        android:layout_width="wrap_content"
        android:layout_height="wrap_content"
        android:layout_marginTop="40dp"
        android:layout_marginEnd="48dp"
        android:layout_marginRight="48dp"
        android:ems="10"
        android:inputType="text"
        app:layout_constraintEnd_toEndOf="parent"
        app:layout_constraintTop_toTopOf="parent">

        <requestFocus />
    </EditText>

    <TextView
        android:id="@+id/textView1"
        android:layout_width="wrap_content"
        android:layout_height="wrap_content"
        android:layout_marginStart="16dp"
        android:layout_marginLeft="16dp"
        android:layout_marginTop="61dp"
        android:text="이름"
        android:textAppearance="?android:attr/textAppearanceMedium"
        app:layout_constraintStart_toStartOf="parent"
        app:layout_constraintTop_toTopOf="parent" />

    <Button
        android:id="@+id/button1"
        android:layout_width="wrap_content"
        android:layout_height="wrap_content"
        android:layout_marginStart="34dp"
        android:layout_marginLeft="34dp"
        android:onClick="insert"
        android:text="추가"
        app:layout_constraintBaseline_toBaselineOf="@+id/button2"
        app:layout_constraintStart_toStartOf="parent" />

    <TextView
        android:id="@+id/textView5"
        android:layout_width="wrap_content"
        android:layout_height="wrap_content"
        android:layout_marginBottom="22dp"
        android:text="전화번호"
        android:textAppearance="?android:attr/textAppearanceMedium"
        app:layout_constraintBottom_toTopOf="@+id/button1"
        app:layout_constraintEnd_toEndOf="@+id/textView1"
        app:layout_constraintStart_toEndOf="@+id/textView1" />

    <EditText
        android:id="@+id/tel"
        android:layout_width="wrap_content"
        android:layout_height="wrap_content"
        android:layout_marginTop="20dp"
        android:ems="10"
        android:inputType="number|text"
        app:layout_constraintStart_toStartOf="@+id/name"
        app:layout_constraintTop_toBottomOf="@+id/name" />

    <Button
        android:id="@+id/button2"
        android:layout_width="wrap_content"
        android:layout_height="wrap_content"
        android:layout_marginTop="11dp"
        android:onClick="search"
        android:text="탐색"
        app:layout_constraintStart_toStartOf="@+id/tel"
        app:layout_constraintTop_toBottomOf="@+id/tel" />

    <TextView
        android:id="@+id/textView"
        android:layout_width="0dp"
        android:layout_height="0dp"
        android:layout_marginTop="45dp"
        android:layout_marginBottom="48dp"
        android:text="여기에 모든 데이터가 표시됩니다."
        android:padding="10dp"
        app:layout_constraintBottom_toBottomOf="parent"
        app:layout_constraintEnd_toEndOf="parent"
        app:layout_constraintStart_toStartOf="parent"
        app:layout_constraintTop_toBottomOf="@+id/button1" />

    <Button
        android:id="@+id/button"
        android:layout_width="wrap_content"
        android:layout_height="wrap_content"
        android:layout_marginTop="11dp"
        android:layout_marginEnd="5dp"
        android:layout_marginRight="5dp"
        android:onClick="select_all"
        android:text="전체 조회"
        app:layout_constraintEnd_toEndOf="@+id/tel"
        app:layout_constraintTop_toBottomOf="@+id/tel" />

</androidx.constraintlayout.widget.ConstraintLayout>
- MainActivity.java
package com.example.database1_curd2;

import static android.database.sqlite.SQLiteDatabase.openOrCreateDatabase;

import androidx.appcompat.app.AppCompatActivity;

import android.content.Context;
import android.database.Cursor;
import android.database.sqlite.SQLiteDatabase;
import android.database.sqlite.SQLiteException;
import android.database.sqlite.SQLiteOpenHelper;
import android.os.Bundle;
import android.view.View;
import android.widget.EditText;
import android.widget.TextView;
import android.widget.Toast;

/*
// SQLiteOpenHelper 클래스 생성
   -- SQLiteOpenHelper : 데이터베이스를 감싸고 있는 도우미 클래스이다.
              . SQLiteDatabase getWritableDatabase() - 읽기/쓰기 모드로 데이터베이스를 오픈한다.
              . SQLiteDatabase getReadableDatabase() - 읽기 전용 모드로 데이터베이스를 오픈한다.

   -- SQLiteDatabase
              . void execSQL(String sql) - select문을 제외한 insert, upgrade, delete에 사용된다.
              . Cursor rawQuery(String sql, String[] selectionArgs)
              ---------------------전용 메소드 지원-------------------------------------
              . Cursor query(boolena distinct, String table, String[] columns, String selection, String[] selectionArgs, String groupBy, String having, orderBy, String limit)
                                  - distinct : 만약 각 행이 유일하다며 true이다.
                                  - table : 쿼리 대상이 되는 테이블
                                  - columns : 어떤 컬럼을 반환할 것인지를 결정한다. null은 모든 컬럼을 반환한다는 의미이다.
                                  - selection : SQL WHERE에 해당되는 필터이다. null은 모든 행을 의미한다.
                                  - groupBy : SQL GROUP BY절에  해당하는 필터이다.
                                  - having : SQL Having절에 해당하는 필터이다.
                                  - orderBy : SQL ORDER BY절에 해당하는 필터이다.
                                  - limit : 반환되는 행의 개수를 제한한다.

              . long insert(String table, String nullColumnHack, ContentValues values)
                                  - table : 행을 추가하는 테이블
                                  - nullColumnHack : 만약 null이 아니면 null값을 삽입하는 컬럼의 이름이 된다.
                                  - values : 삽입되는 값

              . int delete(String table, String whereClause, String[] whereArgs)
                                  - 데이터베이스에서 조건에 맞는 행을 삭제

              . int update(String table, ContentValues values, String whereClause, String[] whereArgs)
                                  - 데이터베이스에서 조건에 맞는 행을 갱신한다.
*/

class DBHelper extends SQLiteOpenHelper {

    private static final String DATABASE_NAME = "mycontacts.db";
    private static final int DATABASE_VERSION = 2;

    DBHelper(Context context) {
        super(context, DATABASE_NAME, null, DATABASE_VERSION);
    }

    @Override
    public void onCreate(SQLiteDatabase sqLiteDatabase) {
        sqLiteDatabase.execSQL("CREATE TABLE contacts(" +
            " _id INTEGER PRIMARY KEY AUTOINCREMENT," +
            "name TEXT," +
            "tel TEXT)");
    }

    @Override
    public void onUpgrade(SQLiteDatabase sqLiteDatabase, int oldversion, int newversion) {
        sqLiteDatabase.execSQL("DROP TABLE IF EXISTS  contacts"); //현재것은 지우고
        onCreate(sqLiteDatabase); //다시 생성한다.
    }

}


public class MainActivity extends AppCompatActivity {

    DBHelper helper;
    SQLiteDatabase db;
    EditText edit_name , edit_tel;
    TextView edit_result;

    @Override
    protected void onCreate(Bundle savedInstanceState) {
        super.onCreate(savedInstanceState);
        setContentView(R.layout.activity_main);

        //1. DBHelper 객체 생성
        helper = new DBHelper(this);
        //2. 쓰기/읽기 모드로 DB 객체를 얻는다.
        try {
            db = helper.getWritableDatabase();
        }catch (SQLiteException e) {
            db = helper.getReadableDatabase();
        }
        edit_name = (EditText) findViewById(R.id.name);
        edit_tel = (EditText) findViewById(R.id.tel);
        edit_result = (TextView) findViewById((R.id.textView));
    }

    //쓰기
    public void insert(View targe) {
        String name = edit_name.getText().toString();
        String tel = edit_tel.getText().toString();
        db.execSQL("INSERT INTO contacts VALUES (null, '"+name+" ',' "+tel+"');");
        Toast.makeText(getApplicationContext(), "성공적으로 추가되었습니다", Toast.LENGTH_SHORT).show();
        edit_name.setText(" ");
        edit_tel.setText(" ");
    }

    //특정검색
    public void search(View target) {
        String name = edit_name.getText().toString();
        Cursor cursor = db.rawQuery("SELECT name, tel FROM contacts WHERE name = ' "+name+" ';", null);
        while(cursor.moveToNext()) {
            String tel = cursor.getString(1);
            edit_tel.setText(tel);
        }
    }

    //전체검색
    public void select_all(View target) {
        Cursor cursor = db.rawQuery("SELECT * FROM contacts", null);
        String s = "id               name            tel \r\n";
        while(cursor.moveToNext()) {
            s += cursor.getString(0)+"          ";
            s += cursor.getString(1)+"             ";
            s += cursor.getString(2)+"          \r\n";
        }
        edit_result.setText(s);
    }

}
2. 로그인
Database3_Login 프로젝트 만들기
- activity_main.xml
<?xml version="1.0" encoding="utf-8"?>
<androidx.constraintlayout.widget.ConstraintLayout xmlns:android="http://schemas.android.com/apk/res/android"
    xmlns:app="http://schemas.android.com/apk/res-auto"
    xmlns:tools="http://schemas.android.com/tools"
    android:id="@+id/linearLayout"
    android:layout_width="match_parent"
    android:layout_height="match_parent"
    tools:context=".MainActivity">

    <TextView
        android:id="@+id/textView"
        android:layout_width="233dp"
        android:layout_height="61dp"
        android:layout_marginTop="28dp"
        android:text="로그인"
        android:textAlignment="center"
        android:textAllCaps="false"
        android:textColor="#3F51B5"
        android:textSize="34sp"
        android:textStyle="italic"
        android:typeface="normal"
        app:layout_constraintEnd_toEndOf="parent"
        app:layout_constraintStart_toStartOf="parent"
        app:layout_constraintTop_toTopOf="parent" />

    <EditText
        android:id="@+id/id"
        android:layout_width="411dp"
        android:layout_height="wrap_content"
        android:layout_marginTop="12dp"
        android:ems="10"
        android:hint="이메일 입력"
        android:inputType="textPersonName"
        app:layout_constraintEnd_toEndOf="parent"
        app:layout_constraintStart_toStartOf="parent"
        app:layout_constraintTop_toBottomOf="@+id/textView" />

    <EditText
        android:id="@+id/pass"
        android:layout_width="411dp"
        android:layout_height="wrap_content"
        android:layout_marginTop="20dp"
        android:hint="패스워드 입력"
        android:inputType="textPassword"
        app:layout_constraintEnd_toEndOf="parent"
        app:layout_constraintStart_toStartOf="parent"
        app:layout_constraintTop_toBottomOf="@+id/id" />

    <Button
        android:id="@+id/button"
        android:layout_width="315dp"
        android:layout_height="48dp"
        android:layout_marginTop="20dp"
        android:backgroundTint="#3F51B5"
        android:onClick="login"
        android:text="로그인"
        app:layout_constraintEnd_toEndOf="parent"
        app:layout_constraintStart_toStartOf="parent"
        app:layout_constraintTop_toBottomOf="@+id/pass" />

    <Button
        android:id="@+id/button2"
        android:layout_width="308dp"
        android:layout_height="49dp"
        android:layout_marginStart="52dp"
        android:layout_marginTop="20dp"
        android:backgroundTint="#FF9800"
        android:onClick="enroll"
        android:text="회원등록"
        app:layout_constraintStart_toStartOf="parent"
        app:layout_constraintTop_toBottomOf="@+id/button" />

</androidx.constraintlayout.widget.ConstraintLayout>
- MainActivity.java
package com.example.database3_login;

import androidx.appcompat.app.AppCompatActivity;
import android.os.Bundle;
import android.content.Context;
import android.database.Cursor;
import android.database.sqlite.SQLiteDatabase;
import android.database.sqlite.SQLiteException;
import android.database.sqlite.SQLiteOpenHelper;
import android.view.View;
import android.widget.EditText;
import android.widget.TextView;
import android.widget.Toast;

class DBHelper extends SQLiteOpenHelper {

    private static final String DATABASE_NAME = "login.db";
    private static final int DATABASE_VERSION = 1;

    public DBHelper(Context context) {
        super(context, DATABASE_NAME, null, DATABASE_VERSION);
    }

    public void onCreate(SQLiteDatabase db) {
        db.execSQL("CREATE TABLE user ( _id INTEGER PRIMARY KEY AUTOINCREMENT, id TEXT, pass TEXT);");
    }

    public void onUpgrade(SQLiteDatabase db, int oldVersion, int newVersion) {
        db.execSQL("DROP T" +
                "" +
                "" +
                "ABLE IF EXISTS user");
        onCreate(db);
    }

}

public class MainActivity extends AppCompatActivity {

    DBHelper helper;
    SQLiteDatabase db;
    EditText edit_id, edit_pass;
    TextView edit_result;

    public void onCreate(Bundle savedInstanceState) {
        super.onCreate(savedInstanceState);
        setContentView(R.layout.activity_main);

        helper = new DBHelper(this);
        //모드 지정
        try {
            db = helper.getWritableDatabase();
        }catch (SQLiteException ex) {
            db = helper.getReadableDatabase();
        }
        edit_id = (EditText) findViewById(R.id.id);
        edit_pass = (EditText) findViewById(R.id.pass);
        edit_result = (TextView) findViewById(R.id.textView);
    }

    public void enroll(View target) {
        String id = edit_id.getText().toString();
        String pass = edit_pass.getText().toString();
        db.execSQL("INSERT INTO user VALUES (null, '" + id + "', '" + pass+ "');");
        Toast.makeText(getApplicationContext(), "성공적으로 추가되었음", Toast.LENGTH_SHORT).show();
        edit_id.setText("");
        edit_pass.setText("");
    }

    // 로그인버튼을 누르면
    public void login(View target) {
        String id = edit_id.getText().toString();
        String pass = edit_pass.getText().toString();
        Cursor cursor;
        cursor = db.rawQuery("SELECT id, pass FROM user WHERE id='"+ id + "';", null);
        while (cursor.moveToNext()) {
            String pass2 = cursor.getString(1);
            if(pass.equals(pass2))
                Toast.makeText(getApplicationContext(), "로그인 성공입니다.",Toast.LENGTH_SHORT).show();
        }
    }

}
3. SimpleCusorAdapter
Database4_SimpleCusorAdapter1 프로젝트 만들기
# Database Adapter : SimpleCusorAdapter
많은 데이터가 저장된 데이터베이스라면 쿼리를 실행하여 그 결과를 화면에 표시하는 시간이 많이 소요된다.
1) SimpleCusorAdapter(Context context, int layout, Cursor c, String[] from, int[] to) : 데이터베이스와 화면을 연결하는 객체.
데이터베이스의 데이터를 읽어서 정해진 레이아웃에 출력해준다.
-> 매개변수 layout : 데이터를 표시할 레이아웃 소스
-> 매개변수 c : 데이터베이스에서 읽어온 커서
-> 매개변수 from : 화면에 표시하고 싶은 데이터베이스에서 읽어온 컬럼들 - 배열로 구현해 놓음
-> 매개변수 to : 각 from의 데이터를 출력할 뷰
- activity_main.xml
<?xml version="1.0" encoding="utf-8"?>
<LinearLayout xmlns:android="http://schemas.android.com/apk/res/android"
    android:orientation="vertical"
    android:layout_width="match_parent"
    android:layout_height="match_parent">

    <TextView
        android:layout_width="match_parent"
        android:layout_height="wrap_content"
        android:layout_marginTop="5dp"
        android:layout_marginBottom="5dp"
        android:text="연락처"
        android:textSize="30sp"
        android:textAlignment="center"/>

    <!--어댑터 연결할 뷰-->
    <ListView
        android:id="@+id/list"
        android:layout_width="match_parent"
        android:layout_height="500dp"
        android:padding="10dp"/>

    <Button
        android:layout_width="wrap_content"
        android:layout_height="wrap_content"
        android:layout_gravity="center_horizontal"
        android:backgroundTint="#2196F3"
        android:text="전체검색"
        android:onClick="dbList"/>

</LinearLayout>
- list.xml
<?xml version="1.0" encoding="utf-8"?>
<LinearLayout xmlns:android="http://schemas.android.com/apk/res/android"
    android:layout_width="match_parent"
    android:layout_height="match_parent"
    android:orientation="vertical"
    android:background="#D9F6F697"
    android:padding="10dp">

    <TextView
        android:id="@+id/item_name"
        android:layout_width="wrap_content"
        android:layout_height="25dp"/>
    <TextView
        android:id="@+id/item_tel"
        android:layout_width="wrap_content"
        android:layout_height="25dp"/>

</LinearLayout>
- MainActivity.java
package com.example.database4_simplecusoradapter1;

import androidx.appcompat.app.AppCompatActivity;

import android.app.Activity;
import android.content.Context;
import android.database.Cursor;
import android.database.sqlite.SQLiteDatabase;
import android.database.sqlite.SQLiteOpenHelper;
import android.os.Bundle;
import android.view.LayoutInflater;
import android.view.View;
import android.view.ViewGroup;
import android.widget.ArrayAdapter;
import android.widget.EditText;
import android.widget.ImageView;
import android.widget.ListView;
import android.widget.SimpleCursorAdapter;
import android.widget.TextView;

class DBHelper extends SQLiteOpenHelper {

    private static final String DATABASE_NAME = "mycontacts.db";
    private static final int DATABASE_VERSION = 2;

    public DBHelper(Context context) {
        super(context, DATABASE_NAME, null, DATABASE_VERSION);
    }

    @Override
    public void onCreate(SQLiteDatabase sqLiteDatabase) {
        sqLiteDatabase.execSQL("CREATE TABLE contacts(_id INTEGER PRIMARY KEY AUTOINCREMENT, name TEXT, tel TEXT )");
        for(int i=0 ; i < 10 ; i++) {
            sqLiteDatabase.execSQL("INSERT INTO contacts VALUES (null, '홍길동' , '010-1234-567 " + i + " '); ");
        }
    }

    @Override
    public void onUpgrade(SQLiteDatabase sqLiteDatabase, int oldversion, int newversion) {
        sqLiteDatabase.execSQL("DROP TABLE IF EXISTS contacts");
        onCreate(sqLiteDatabase);
    }

}


public class MainActivity extends AppCompatActivity {

    DBHelper helper;
    SQLiteDatabase db;
    EditText edit_name,  edit_tel;

    @Override
    protected void onCreate(Bundle savedInstanceState) {
        super.onCreate(savedInstanceState);
        setContentView(R.layout.activity_main);

        helper = new DBHelper(this);
        db = helper.getWritableDatabase(); //쓰기모드
        Cursor cursor = db.rawQuery("SELECT * FROM contacts", null);
        //액티비티가 커서 객체를 관리하도록 함 - 액티비티의 생명주기와 커서의 생명주기를 일치시킨다.
        startManagingCursor(cursor);

        //list.xml을 뷰객체화
        LayoutInflater inflater = this.getLayoutInflater();
        View rowView = inflater.inflate(R.layout.list, null , false);

        //출력할 필드 배열로 지정
        String[] from = {"name", "tel"};

        //TextView tname = (TextView) rowView.findViewById(R.id.item_name);
        //TextView ttel = (TextView) rowView.findViewById(R.id.item_tel);
        //필드를 출력할 뷰
        int[] to = {R.id.item_name, R.id.item_tel};

        //어댑터 생성
        SimpleCursorAdapter adapter = new SimpleCursorAdapter(this, R.layout.list, cursor, from, to);
        ListView list = (ListView)findViewById(R.id.list);

        //어댑터를 list에 설정
        list.setAdapter(adapter);
    }

}
4. 파일
File1_basic 프로젝트 만들기
# 내부 저장소
1) 내부저장소에 저장되는 file은 해당 앱에서만 접근이 가능하다.
2) 위치 : data/data/패키지명/files/파일
3) 구현방법
-> try ~ catch문 안에서 구현한다.
-> 쓰기 : write(), 읽기 : read()
(1) 파일쓰기
-> 출력스트림 : FileOutPutStream fos = openFileOutput("파일명", mode);
mode 종류로는
MODE_PRIVATE : 새로운 파일을 생성, 같은 이름이 있으면 삭제 후 생성
MODE_APPEND : 기존 파일에 이어서 추가 생성
-> 쓰기 : fos.write(str.getBytes());
-> 닫기 : fos.close();
(2) 파일읽기
-> 입력스트림 : FileInputStream fis = openFileInput("파일명");
-> 바이트 배열 준비 : byte[] buffer = new byte[크기];
-> 바이트 단위로 읽기 : fis.read(buffer);
-> 닫기 : fis.close();
(3) 경로 알아오기
-> 디렉터리 알아오기 : File file = getApplicationContext().getFilesDir();
file.getPath();
-> 파일명까지 읽기 : File file = getApplicationContext().getFilesStreamPath(파일명);
file.getPath();
-> 리스트로 가져오기 : getApplicationContext().filelist().toString();
-> 파일 삭제 : File file = getApplicationContext().deleteFile(파일명);
- activity_main.xml
<?xml version="1.0" encoding="utf-8"?>
<LinearLayout xmlns:android="http://schemas.android.com/apk/res/android"
    android:layout_width="match_parent"
    android:layout_height="match_parent"
    android:orientation="vertical"
    android:padding="10dp">

    <TextView
        android:layout_width="match_parent"
        android:layout_height="wrap_content"
        android:layout_marginTop="15dp"
        android:text="내부저장장치의 File에 데이터 저장"
        android:textSize="25sp"
        android:textAlignment="center"
        android:textStyle="italic|bold"/>

    <EditText
        android:id="@+id/data"
        android:layout_width="match_parent"
        android:layout_height="0dp"
        android:layout_weight="6"
        android:layout_marginTop="10dp"
        android:background="#E7E6E6"
        android:gravity="left|top"
        android:padding="15dp"
        android:singleLine="false"/>

    <LinearLayout
        android:layout_width="match_parent"
        android:layout_height="0dp"
        android:layout_weight="1"
        android:orientation="horizontal"
        android:layout_marginTop="10dp"
        android:gravity="center_horizontal">
        <Button
            android:id="@+id/read"
            android:layout_width="wrap_content"
            android:layout_height="wrap_content"
            android:layout_marginRight="10dp"
            android:text="읽기"/>
        <Button
            android:id="@+id/write"
            android:layout_width="wrap_content"
            android:layout_height="wrap_content"
            android:text="저장"/>
    </LinearLayout>

</LinearLayout>
- MainActivity.java
package com.example.file1_basic;

import androidx.appcompat.app.AppCompatActivity;

import android.content.Context;
import android.os.Bundle;
import android.view.MotionEvent;
import android.view.View;
import android.widget.Button;
import android.widget.EditText;
import android.widget.Toast;

import java.io.File;
import java.io.FileInputStream;
import java.io.FileOutputStream;
import java.io.IOError;
import java.io.IOException;
import java.nio.charset.StandardCharsets;

public class MainActivity extends AppCompatActivity {

    String FILENAME = "test.txt";
    EditText data;

    @Override
    protected void onCreate(Bundle savedInstanceState) {
        super.onCreate(savedInstanceState);
        setContentView(R.layout.activity_main);

        //위젯을 가져온다.
        data = (EditText) findViewById(R.id.data);
        Button readBtn = (Button) findViewById(R.id.read);
        Button writeBtn = (Button) findViewById(R.id.write);
        //쓰기
        writeBtn.setOnTouchListener(new View.OnTouchListener() {
            @Override
            public boolean onTouch(View view, MotionEvent motionEvent) {
                try{
                    FileOutputStream fos = openFileOutput(FILENAME, Context.MODE_APPEND); //Context.MODE_PRIVATE
                    fos.write(data.getText().toString().getBytes());
                    fos.close();
                    data.setText(" ");
                    Toast.makeText(getApplicationContext(), "저장되었습니다.", Toast.LENGTH_SHORT).show();
                }catch (IOException e) {}
                return true;
            }
        });
        // 읽기
        readBtn.setOnTouchListener(new View.OnTouchListener() {
            @Override
            public boolean onTouch(View view, MotionEvent motionEvent) {
                try {
                    FileInputStream fis = openFileInput(FILENAME);
                    byte[] buffer = new byte[1000];
                    fis.read(buffer);
                    // File file = getApplicationContext().getFilesDir();
                    File file = getApplicationContext().getFileStreamPath(FILENAME);
                    data.setText(new String(buffer) + "\n 파일경로: " + file.getPath());
                    fis.close();
                }catch (IOException e) {
                    Toast.makeText(getApplicationContext(), "파일을 읽을수가 없습니다.", Toast.LENGTH_SHORT).show();
                }
                return true;
            }
        });
    }

}
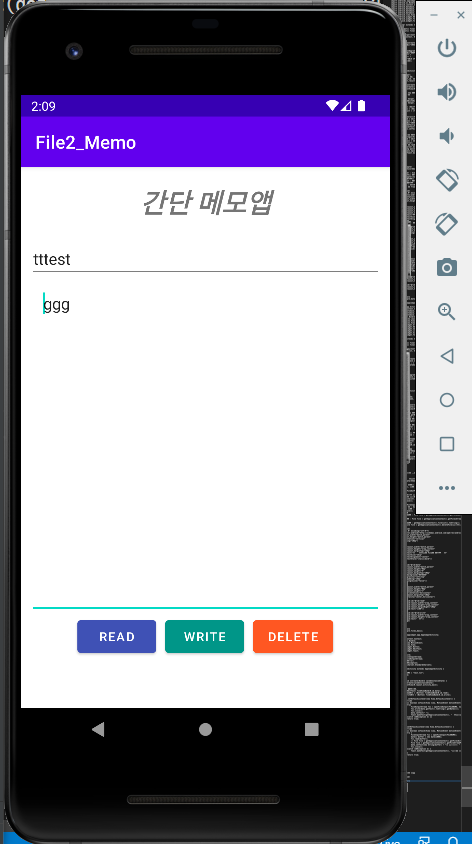
5. 파일 - 메모
File2_Memo 프로젝트 생성
- activity_main.xml
<?xml version="1.0" encoding="utf-8"?>
<LinearLayout xmlns:android="http://schemas.android.com/apk/res/android"
    android:layout_width="match_parent"
    android:layout_height="match_parent"
    android:orientation="vertical"
    android:padding="10dp">

    <TextView
        android:layout_width="match_parent"
        android:layout_height="wrap_content"
        android:layout_marginTop="10dp"
        android:text="간단 메모앱"
        android:textSize="30sp"
        android:textStyle="italic|bold"
        android:textAlignment="center"/>

    <EditText
        android:id="@+id/fileName"
        android:layout_width="match_parent"
        android:layout_height="wrap_content"
        android:layout_marginTop="20dp"
        android:hint="파일이름"/>

    <EditText
        android:id="@+id/memo"
        android:layout_width="match_parent"
        android:layout_height="0dp"
        android:layout_weight="4"
        android:hint="여기에 메모내용을 작성해 주십시요"
        android:gravity="left|top"
        android:padding="15dp"/>

    <LinearLayout
        android:layout_width="match_parent"
        android:layout_height="0dp"
        android:orientation="horizontal"
        android:layout_weight="1"
        android:gravity="center_horizontal">
        <Button
            android:id="@+id/readBtn"
            android:layout_width="wrap_content"
            android:layout_height="wrap_content"
            android:layout_marginRight="10dp"
            android:text="READ"
            android:backgroundTint="#3F51B5"
            android:textColor="#ffffff"/>
        <Button
            android:id="@+id/writeBtn"
            android:layout_width="wrap_content"
            android:layout_height="wrap_content"
            android:layout_marginRight="10dp"
            android:text="WRITE"
            android:backgroundTint="#009688"
            android:textColor="#ffffff"/>
        <Button
            android:id="@+id/deleteBtn"
            android:layout_width="wrap_content"
            android:layout_height="wrap_content"
            android:text="DELETE"
            android:backgroundTint="#FF5722"
            android:textColor="#ffffff"/>
    </LinearLayout>

</LinearLayout>
- MainActivity.java
package com.example.file2_memo;

import androidx.appcompat.app.AppCompatActivity;

import android.content.Context;
import android.os.Bundle;
import android.view.View;
import android.widget.Button;
import android.widget.EditText;
import android.widget.Toast;

import java.io.File;
import java.io.FileInputStream;
import java.io.FileOutputStream;
import java.io.IOException;

public class MainActivity extends AppCompatActivity {

    EditText fileName;
    EditText memo;
    String filestr;

    @Override
    protected void onCreate(Bundle savedInstanceState) {
        super.onCreate(savedInstanceState);
        setContentView(R.layout.activity_main);

        fileName = (EditText)findViewById(R.id.fileName);
        memo = (EditText)findViewById(R.id.memo);

        //저장
        Button writeBtn = (Button) findViewById(R.id.writeBtn);
        writeBtn.setOnClickListener(new View.OnClickListener() {
            @Override
            public void onClick(View view) {
                try{
                    filestr = fileName.getText().toString();

                    //출력스트림을 연다
                    FileOutputStream fos = openFileOutput(filestr,  Context.MODE_PRIVATE);
                    fos.write(memo.getText().toString().getBytes());
                    memo.setText(" ");
                    fos.close();

                    File file =  getApplicationContext().getFileStreamPath( filestr );
                    Toast.makeText(getApplicationContext(), file.getPath() + "파일이 생성되었습니다.", Toast.LENGTH_SHORT).show();
                }catch (IOException e) {}
            }
        });

        //읽기
        fileName.setText(filestr);
        Button readBtn = (Button) findViewById(R.id.readBtn);
        readBtn.setOnClickListener(new View.OnClickListener() {
            public void onClick(View v) {
                try {
                    FileInputStream fis = openFileInput(filestr);
                    byte[] buffer = new byte[fis.available()];
                    fis.read(buffer);
                    memo.setText(new String(buffer));
                    fis.close();
                } catch (IOException e) {
                }
            }
        });

        //삭제
        Button deleteButton = (Button) findViewById(R.id.deleteBtn);
        deleteButton.setOnClickListener(new View.OnClickListener() {
            public void onClick(View v) {
                if(filestr != null) {
                    deleteFile(filestr);
                    memo.setText(" ");
                    fileName.setText(" ");
                }
                //이제부터는  파일리스트를 출력해보자 -        String[]    getApplicationContext().fileList()   활용
                String filelist ="";
                String[] file = getApplicationContext().fileList();
                for (int i=0; i<file.length; i++){
                    filelist += file[i].toString()+",  ";
                }
                if(filelist != null && filelist != ""){
                    Toast.makeText(getApplicationContext(), "남아있는 파일은 : " + filelist, Toast.LENGTH_LONG).show();
                }else {
                    Toast.makeText(getApplicationContext(), "남아있는 파일이 없습니다.", Toast.LENGTH_LONG).show();
                }
            }
        });
    }

}
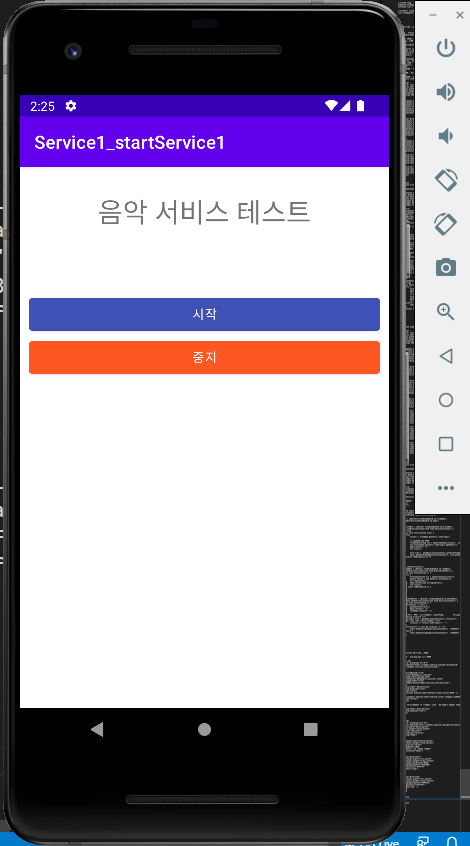
6. 서비스 - 시작타입 서비스
Service1_startService1 프로젝트 만들기
res/raw 폴더 만들고 old_pop.mp3 파일 넣기
- AndroidManifest.xml
<?xml version="1.0" encoding="utf-8"?>
<manifest xmlns:android="http://schemas.android.com/apk/res/android"
    package="com.example.service1_startservice1">

    <application
        android:allowBackup="true"
        android:icon="@mipmap/ic_launcher"
        android:label="@string/app_name"
        android:roundIcon="@mipmap/ic_launcher_round"
        android:supportsRtl="true"
        android:theme="@style/Theme.Service1_startService1">
        <activity
            android:name=".MainActivity"
            android:exported="true">
            <intent-filter>
                <action android:name="android.intent.action.MAIN" />

                <category android:name="android.intent.category.LAUNCHER" />
            </intent-filter>
        </activity>

        <!--다른 컴포넌트들이 이 서비스를 사용할 수 있도록 하려면 이렇게 선언해야하고. 만약 애플리케이션 안에서만 하려면 선언안해도된다.-->
        <service
            android:name=".MusicService"
            android:enabled="true"/>
    </application>

</manifest>
- activity_main.xml
<?xml version="1.0" encoding="utf-8"?>
<LinearLayout xmlns:android="http://schemas.android.com/apk/res/android"
    android:layout_width="match_parent"
    android:layout_height="match_parent"
    android:gravity="top|center"
    android:orientation="vertical"
    android:padding="10dp">

    <TextView
        android:layout_width="match_parent"
        android:layout_height="wrap_content"
        android:gravity="center"
        android:padding="20dp"
        android:text="음악 서비스 테스트"
        android:textSize="30sp"/>

    <Button
        android:id="@+id/start"
        android:layout_width="fill_parent"
        android:layout_height="wrap_content"
        android:layout_marginTop="50dp"
        android:backgroundTint="#3F51B5"
        android:textColor="#ffffff"
        android:text="시작">
    </Button>

    <Button
        android:id="@+id/stop"
        android:layout_width="fill_parent"
        android:layout_height="wrap_content"
        android:backgroundTint="#FF5722"
        android:textColor="#ffffff"
        android:text="중지">
    </Button>

</LinearLayout>
- MainActivity.java
package com.example.service1_startservice1;

import androidx.appcompat.app.AppCompatActivity;

import android.content.Intent;
import android.os.Bundle;
import android.view.View;
import android.widget.Button;
/*
    서비스(Service)
        . 사용자 인터페이스 없이(화면없이) 백그라운드에서 실행되는 동작을 구현한다.

        . 특징
           - 사용자 인터페이스를 가지지 않는다.
           - 일반적으로 애플리케이션에 의해 시작된다.
           - 한번 시작된 서비스는 사용자가 다른 애플리케이션으로 이동하더라도 계속 백그라운드에서 실행된다.

            . 사용자 인터페이스 없이 백그라운드에서 실행되게 하는 메커니즘이다.
            . 애플리케이션에 의해 시작되고, 한번 시작된 서비스는 애플리케이션이 이동되더라도 계속 백그라운드에서 실행된다.
            . 활용용도
                  -  배경 음악재생, 파일 입출력, 네트워크 트랜젝션, 콘텐트 제공자와  통신 등에 활용된다.
            . 종류
                1)  시작타입 서비스  :  서비스가 실행되면  서비스 시작을 담당했던  컴포넌트가 소멸되더라도  서비스는 백그라운드에서 실행된다.
                                       중지하는 방법은....  stopService()호출   또는   서비스 스스로   stopSelf() 사용 자체적으로 중지처리  두가지가 있다.

                                                    (MainActivity)                                              (Service)
                            -  startService( intent ) 호출   :  서비스 시작    --- > onStartComman()에서 서비스를 시작시킨다.
                            -  stopService( intent )  호출  :   서비스 종료    --- > 여기에 대응되는 콜백메소드가 없다.
                                                                                     onDestory()에서   실행하고 있는 서비스를 중지처리 하면된다.

                2)  연결타입 서비스: 클라이언트 - 서버 모델에서  서버의 역할을 하는 서비스이다.
                                                 컴포넌트들로 부터 요청을 받고  결과를 보낼수 있다.
                                                 애플리케이션의 컴포넌트들이  연결되어 있는 한, 해당 작업을 수행한다.

                        - bindService() 호출 : 서비스 시작
                        - unbindService()로 연결해체 : 서비스 종료

          .  구현방법
                    1) 사용자 인터페이스는 필요없다 -  xml, view 필요없다.
                    2) Service를 상속받은  클래스로 서비스를 구현한다. 이때 클래스는 public이어야 한다.
                        .  Service의 onBind() 추상메소드 구현
                        .  onCreate() 재정의 - 어떤 서비스를 할것인지 서비스 생성
                        .  onStartCommand() 재정의 - 서비스객체. start() - 서비스시작
                        .  onDestroy() 재정의 - 서비스객체.stop() - 서비스종료
                    2) MainActivity.java에서 startService(inten)로 서비스 매니페스트에 서비스 등록
                        .  startService( new Intent(this, 서비스클래스.class)
                        .  stopService( new Intent(this, 서비스클래스.class)
                    3) 매니페스트에 서비스 등록
                        <application>안에 <serviec> 등록
                -  다른 컴포넌트가 이 액티비티
*/

public class MainActivity extends AppCompatActivity implements View.OnClickListener {//View.OnClickListener 구현

    Button start, stop;

    @Override
    protected void onCreate(Bundle savedInstanceState) {
        super.onCreate(savedInstanceState);
        setContentView(R.layout.activity_main);

        start = (Button)findViewById(R.id.start);
        stop = (Button)findViewById(R.id.stop);

        //View.OnClickListen 인터페이스의 메소드
        start.setOnClickListener(this);
        stop.setOnClickListener(this);
    }

    //View.OnClickListen 인터페이스의 메소드 추상메소드
    @Override
    public void onClick(View view) {
        switch (view.getId()) {
            case R.id.start:
                startService(new Intent(this, MusicService.class)); //사용자 인터페이스 없이 넘어간다. manifest에 등록 안해도 된다.
                break;
            case R.id.stop:
                stopService(new  Intent(this, MusicService.class));
                break;
        }
    }

}
- MusicService.java
package com.example.service1_startservice1;

import android.app.Service;
import android.content.Intent;
import android.media.MediaPlayer;
import android.os.IBinder;
import android.widget.Toast;

//public 클래스이어야 한다.
public class MusicService extends Service {

    MediaPlayer player;

    //Service가 가지고 있는 추상메소드 - 오버라이딩 꼭 해둬야 한다.
    //클라이언트가 데이터를 보내고 서비스 결과를 받아야 하는 연결서비스에서 구현한다.
    @Override
    public IBinder onBind(Intent intent) {
        return null;
    }

    //아래 필요한 Life Cycle 메소드들을 꺼내서 오버라이딩해서 구현한다.
    @Override
    public void onCreate() {//준비
        super.onCreate();
        player = MediaPlayer.create(this, R.raw.old_pop);
        player.setLooping(false); //무한반복 - true
    }

    //서비스 시작 - 서비스.start()
    @Override
    public int onStartCommand(Intent intent, int flags, int startId) {
        player.start();  //시작
        Toast.makeText(getApplicationContext(), "서비스가 시작되었습니다.", Toast.LENGTH_SHORT).show();
        return super.onStartCommand(intent, flags, startId);
    }

    //서비스 종료 - 서비스.stop()
    @Override
    public void onDestroy() {
        super.onDestroy();
        player.stop(); // 종료
        Toast.makeText(getApplicationContext(), "서비스가 종료되었습니다.", Toast.LENGTH_SHORT).show();
    }

    //이제  AndroidManifest.xml의 <application> 안에 <service>를 등록한다.
    //물론 다른 액티비티에서 이 액티비를 실행하겠다고 한다면 인텐트필터를 등록해둘 수 있다.

}
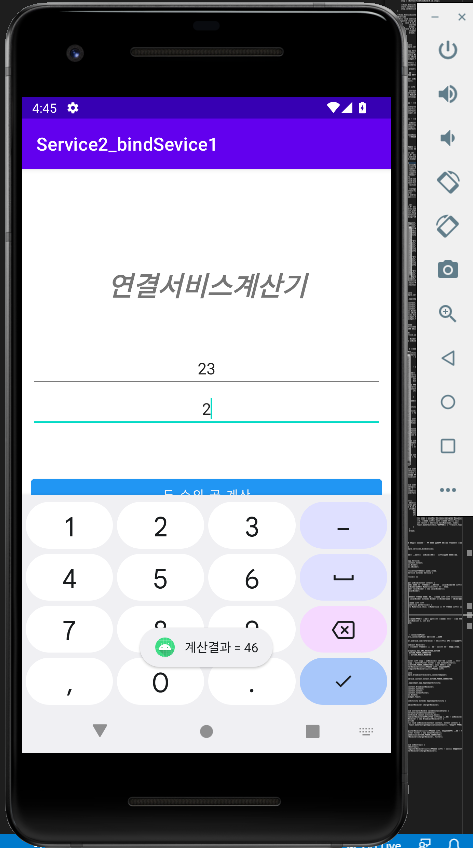
7. 서비스 - 연결타입 서비스
Service2_bindSevice1 프로젝트 만들기
- AndroidManifest.xml
<?xml version="1.0" encoding="utf-8"?>
<manifest xmlns:android="http://schemas.android.com/apk/res/android"
    package="com.example.service2_bindsevice1">

    <application
        android:allowBackup="true"
        android:icon="@mipmap/ic_launcher"
        android:label="@string/app_name"
        android:roundIcon="@mipmap/ic_launcher_round"
        android:supportsRtl="true"
        android:theme="@style/Theme.Service2_bindSevice1">
        <activity
            android:name=".MainActivity"
            android:exported="true">
            <intent-filter>
                <action android:name="android.intent.action.MAIN" />

                <category android:name="android.intent.category.LAUNCHER" />
            </intent-filter>
        </activity>
        <service android:name=".MyService" android:enabled="true"/>
    </application>

</manifest>
- activity_main.xml
<?xml version="1.0" encoding="utf-8"?>
<LinearLayout xmlns:android="http://schemas.android.com/apk/res/android"
    android:layout_width="match_parent"
    android:layout_height="match_parent"
    android:orientation="vertical"
    android:padding="10dp">

    <TextView
        android:layout_width="match_parent"
        android:layout_height="wrap_content"
        android:layout_marginTop="100dp"
        android:text="연결서비스계산기"
        android:textSize="30sp"
        android:textStyle="bold|italic"
        android:gravity="center_horizontal"/>

    <EditText
        android:id="@+id/editNum1"
        android:layout_width="match_parent"
        android:layout_height="wrap_content"
        android:layout_marginTop="50dp"
        android:gravity="center_horizontal"
        android:inputType="number"/>

    <EditText
        android:id="@+id/editNum2"
        android:layout_width="match_parent"
        android:layout_height="wrap_content"
        android:gravity="center_horizontal"
        android:inputType="number"/>

    <Button
        android:id="@+id/btnCalc"
        android:layout_width="match_parent"
        android:layout_height="wrap_content"
        android:backgroundTint="#2196F3"
        android:layout_marginTop="50dp"
        android:onClick="mOnClick"
        android:text="두 수의 곱 계산"
        android:textColor="#F8F5F5"/>

</LinearLayout>
- MainActivity.java
package com.example.service2_bindsevice1;

import androidx.appcompat.app.AppCompatActivity;

import android.content.ComponentName;
import android.content.Context;
import android.content.Intent;
import android.content.ServiceConnection;
import android.os.Bundle;
import android.os.IBinder;
import android.view.View;
import android.widget.EditText;
import android.widget.Toast;

/*
    연결타입 서비스
            ; 컴포넌트들로 부터 서비스 요청을 받고 그 결과를 보낼수 있다
              그런 의미에서  클라이언트와 서버모델과 유사하며 서비스가 서버모델역할을 하는 것이다.

       (구현방법)
        1) MyService.java

               ① Binder를 상속받은  LocalService 내부 클래스를  구현해서  MyService의 객체를 담아 놓는다.
               ② onBind메소드에서    IBider타입의 객체를 만들어서  return해 놓는다.
                         public IBinder onBind(Intent intent) {
                                // LocalServce객체를  IBinder타입으로 리턴해 놓는다.
                        return  localBinder;
                ③ 서비스를 정의해 놓은  메소드를 구현해 놓는다.

         2)  MainActivity.java
                ① ServiceConnection인터페이스객체를 생성한다.  이때  두개의 추상메소드를 구현한다.
                    - onServiceConnected(ComponentName componentName, IBinder iBinder)
                           // 여기에서  매개변수로 받은  iBinder속에서  MyService객체를  가져온다.
                                >>  getService()를 호출해서   서비스를 연결한다.
                                >> 이 객체에서  서비스메소드를 호출해서  아래 이벤트로 처리하려고 하는 것이다.
                                >> 연결된것에 대해  flag 값을  둬서   true로  설정해 둔다.
                    - onServiceDisconnected(ComponentName componentName)
                               >> 연결해제 하면   flag값을  둬서  false로 설정해 둔다.

          3)  서비스를 연결한다.
                @Override
                protected void onStart() {
                    Intent intent = new Intent(this,MyService.class);
                    bindService(intent,  mCon, Context.BIND_AUTO_CREATE);  // 인텐트, 서비스객체, 바인드자동생성모드
                }
         4)  서비스 연결해제
                @Override
                protected void onStop() {
                    if(mBound){
                        unbindService(mCon);   // 서비스
                        mBound=false;
                    }
                }
         5)  서비스처리
*/

public class MainActivity extends AppCompatActivity {

    MyService mService;
    boolean mBound = false; //서비스와 연결여부 체크용 변수 : 연결되면 true, 연결안되면 false

    @Override
    protected void onCreate(Bundle savedInstanceState) {
        super.onCreate(savedInstanceState);
        setContentView(R.layout.activity_main);
    }

    //1. ★ ServiceConnetcion객체생성 - 2개의 추상메소드 구현
    //1) onServiceConnected(컴포넌트, IBinder)로 IBinder가 MyService onBind()의 return된 IBinder로 받아와진다.
    //2) onServiceDisconnected(컴포넌트)
    ServiceConnection mCon = new ServiceConnection() {

        @Override
        public void onServiceConnected(ComponentName componentName, IBinder iBinder) {//iBinder라는 틀의 객체를 가져오는데.. 이것이 MyService객체가 들어있는 것이다.
            //3. 바인더 객체의 메서드  호출 : 서비스 객체얻기 --- MyService에서 만들어 놓은 LocalBinder클래스객체와 그속의 getService()메소드
            mService = ((MyService.LocalBinder)iBinder).getService(); //MyService클래스속의 내부클래스 LocalBinder타입의  iBinder(매개변수로 받은것)속의  getService()호출 >> MyService객체 가져온다
            mBound = true; //서비스와 연결되면 true
        }

        @Override
        public void onServiceDisconnected(ComponentName componentName) {
            mBound = false; //서비스와 연결안되면 false
        }

    };

    @Override
    protected void onStart() {
        super.onStart();
        Intent intent = new Intent(this, MyService.class);
        //2.서비스와 연결하기.
        bindService(intent, mCon, Context.BIND_AUTO_CREATE); //(인텐트, 서비스객체, 바인드자동생성모드)
    }

    @Override
    protected void onStop() {
        super.onStop();
        if(mBound) {
            unbindService(mCon); //5. 서비스와 연결해제
            mBound=false;
        }
    }

    //이벤트 메소드
    public void mOnClick(View view) {
        switch(view.getId()) {
            case R.id.btnCalc :
                if(mBound) {//해야할 서비스가 있다면
                    EditText editNum1 = (EditText)findViewById(R.id.editNum1);
                    EditText editNum2 = (EditText)findViewById(R.id.editNum2);
                    if(editNum1.length() > 0 && editNum2.length() > 0) {
                        int num1 = Integer.parseInt(editNum1.getText().toString());
                        int num2 = Integer.parseInt(editNum2.getText().toString());
                        //4. 서비스 객체를 통해 서비스 메서드 호출
                        int result = mService.CalcNum(num1, num2);
                        Toast.makeText(this,"계산결과 = "+result,Toast.LENGTH_LONG).show();
                    }
                }
                break;
        }
    }

}

//실행 :  두개의 숫자를 입력하고  두 수의 곱계산 버튼을 클릭하면 서비스와 통신하여 계산하고 그 결과를 토스트 메시지로 표시한다.
- MyService.java
package com.example.service2_bindsevice1;

/*
    바인더 클래스를 만들어서  onBind()에서   객체생성후 반환한다.
*/

import android.app.Service;
import android.content.Intent;
import android.os.Binder;
import android.os.IBinder;

// 1. [필수] Service추상클래스를 상속받는다.
public class MyService extends Service {

    public MyService() {}

    @Override
    public IBinder onBind(Intent intent) {
        //3. [필수] 아래 내부클래스로 구현해놓은 LocalBinder의 객체를 생성해서 IBinder타입으로 반환한다.
        //- LocalBinder속에는 MyService객체를 담고 있다.
        LocalBinder localBinder = new LocalBinder();
        return localBinder;
    }

    //2. [필수] 바인더 클래스 정의: 현재 서비스 객체 리턴 *************************************
    public class LocalBinder extends Binder {//Binder상속 - IBider타입에 MyService를 묶기위해 상속받아 구현한다.

        //현재 서비스 객체 리턴
        public MyService getService() {
            return MyService.this; //MyService 즉 이 클래스 객체를 호출한 곳으로 반환한다.
        }

    }
   // *******************************************************************************************

    //4. [필수] 서비스(두수를 받아서 곱해주는 서비스) 해야할 일을 정의한 메서드 추가
    public int CalcNum(int n, int m){
        return n*m;
    }

}
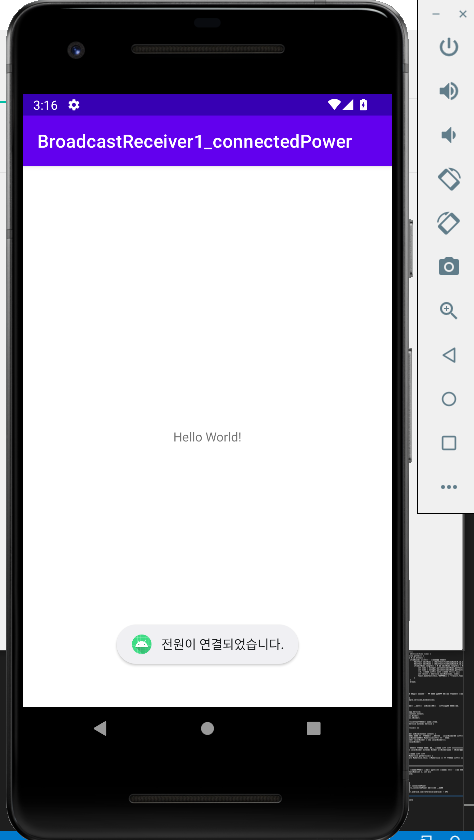
8. 브로드캐스트 - connectedPower
BroadcastReceiver1_connectedPower 프로젝트 만들기
https://developer.android.com/reference/ - 안드로이드 API 개발자가이드 참조
# 방송수신자(Broadcast Receiver)
: 안드로이드에서 발생하는 이벤트를 받겠다고 등록해 놓고 수신받는다.
1) 종류
-> 문자수신 : Telephony.Sms.SMS_RECEIVED_ACTION
-> 충전기연결 : ACTION_POWER_CONNECTED
-> 외부장치연결 : ACTION_MEDIA_MOUNTED
등등...
2) 구현
-> BroadcastReceiver 객체 생성 : onReceive() {방송을 받았을 때 해야할 코드}
-> 인텐트 필터 생성 : IntentFilter filter = new IntentFilter();
filter.addAction(ACTION_POWER_CONNECTED); 등등 필요한 것들
-> 등록 : registerReceiver(브로드캐스트 객체, 인텐트필터)
-> 등록해제 : unregisterReceiver(브로드캐스트 객체)
- MainActivity.java
package com.example.broadcastreceiver1_connectedpower;

import static android.content.Intent.ACTION_POWER_CONNECTED;

import androidx.appcompat.app.AppCompatActivity;

import android.content.BroadcastReceiver;
import android.content.Context;
import android.content.Intent;
import android.content.IntentFilter;
import android.os.Bundle;
import android.widget.Toast;

public class MainActivity extends AppCompatActivity {

    private BroadcastReceiver chargerReceiver;

    @Override
    protected void onCreate(Bundle savedInstanceState) {
        super.onCreate(savedInstanceState);
        setContentView(R.layout.activity_main);
        //1. BroadcastReceiver인터페이스 객체생성 (구현) - onReceive()
        chargerReceiver = new BroadcastReceiver() {
            @Override
            public void onReceive(Context context, Intent intent) {
                Toast.makeText(getApplicationContext(), "전원이 연결되었습니다.", Toast.LENGTH_SHORT).show();
            }
        };
        //2. registerReceiver(브로드캐스트 객체, 인텐트필터) 구현 - 이런 이벤트액션을 받겠다고 등록
        IntentFilter filter = new IntentFilter();
        filter.addAction(ACTION_POWER_CONNECTED);
        registerReceiver(chargerReceiver, filter);
    }

    @Override
    protected void onDestroy() {
        super.onDestroy();
        //3. unregisterReceiver(브로드캐스트 객체) - 등록된 수신허용이벤트 해제
        unregisterReceiver(chargerReceiver);
    }

}
9. 브로드캐스트 - SMS
BroadcastReceiver2_SMS 프로젝트 만들기
# 구현방법
1) BroadcastReceiver 객체생성
2) onReceive() 추상메서드 구현 - 방송을 받았을 때 해야할 코드
3) onCreate() 메서드에서 동적으로 권한 부여 처리
4) onResume()
-> 인텐트 필터 생성
-> 필터에 액션설정
-> 방송수신연결(등록) - registerReceiver(리시버객체, 인텐트필터)
5) onPause() 메서드에서 방송 수신 등록 해제 - unregisterReceiver(리시버)
- AndroidManifest.xml
<?xml version="1.0" encoding="utf-8"?>
<manifest xmlns:android="http://schemas.android.com/apk/res/android"
    package="com.example.broadcastreceiver2_sms">

    <!--SMS받고 읽을 수 있는 권한부여 - 여기에 설정하면 앱이 시작되기 전에 부여된다.-->
    <uses-permission android:name="android.permission.READ_SMS"/>
    <uses-permission android:name="android.permission.RECEIVE_SMS"/>

    <application
        android:allowBackup="true"
        android:icon="@mipmap/ic_launcher"
        android:label="@string/app_name"
        android:roundIcon="@mipmap/ic_launcher_round"
        android:supportsRtl="true"
        android:theme="@style/Theme.BroadcastReceiver2_SMS">
        <activity
            android:name=".MainActivity"
            android:exported="true">
            <intent-filter>
                <action android:name="android.intent.action.MAIN" />

                <category android:name="android.intent.category.LAUNCHER" />
            </intent-filter>
        </activity>
    </application>

</manifest>
- activity_main.xml
<?xml version="1.0" encoding="utf-8"?>
<LinearLayout xmlns:android="http://schemas.android.com/apk/res/android"
    android:orientation="vertical"
    android:layout_width="match_parent"
    android:layout_height="match_parent"
    android:gravity="center_horizontal">

    <TextView
        android:layout_width="wrap_content"
        android:layout_height="wrap_content"
        android:layout_marginTop="100dp"
        android:text="문자를 수신하는 앱입니다."
        android:textSize="25sp"
        android:textColor="#3F51B5"
        android:textStyle="bold"
        android:layout_gravity="center_horizontal"/>

    <TextView
        android:id="@+id/tv"
        android:layout_width="wrap_content"
        android:layout_height="100dp"
        android:layout_marginTop="100dp"
        android:hint="문자 메시지가 출력됩니다"
        android:textSize="25sp"
        android:textStyle="italic|bold"
        android:textColor="#E91E63"
        android:layout_gravity="center_horizontal"
        android:gravity="left|top"/>

</LinearLayout>
- MainActivity.java
package com.example.broadcastreceiver2_sms;

import android.Manifest;
import android.content.BroadcastReceiver;
import android.content.Context;
import android.content.Intent;
import android.content.IntentFilter;
import android.content.pm.PackageManager;
import android.os.Bundle;
import android.provider.Telephony;
import android.telephony.SmsMessage;
import android.widget.TextView;
import android.widget.Toast;
import androidx.appcompat.app.AppCompatActivity;
import androidx.core.app.ActivityCompat;
import androidx.core.content.ContextCompat;

public class MainActivity extends AppCompatActivity {

    private int MY_PERMISSIONS_REQUEST_SMS_RECEIVE = 10; //Request Code
    TextView sms;

    //1. 방송수신자 객체생성
    BroadcastReceiver receiver = new BroadcastReceiver() {

        //onReceive 구현 - 방송 수신시 해야할 코드
        @Override
        public void onReceive(Context context, Intent intent) {
            if(intent.getAction().equals(Telephony.Sms.Intents.SMS_RECEIVED_ACTION)) {
                String smsSender = "홍길동님";
                String smsBody = " ";
                for(SmsMessage smsMessage : Telephony.Sms.Intents.getMessagesFromIntent(intent)) {
                    smsBody += smsMessage.getMessageBody();
                }
                //Toast.makeText(getApplicationContext(), smsBody, Toast.LENGTH_SHORT).show();
                sms.setText(smsSender+":   \n "+smsBody);
            }
        }

    };

    @Override
    public void onCreate(Bundle savedInstanceState) {
        super.onCreate(savedInstanceState);
        setContentView(R.layout.activity_main);

        sms = (TextView)findViewById(R.id.tv);
        //앱에 권한이 설정되어 있는지 체크 - 매니페스트에 해놨지만, 앱이 실행되기전에 다시 허락을 맡는것이 필요하다. 그래서 동적으로 권한부여한다.
        //1) 권한들을 배열로 설정
        String[] permission = new String[]{
                Manifest.permission.READ_SMS,
                Manifest.permission.RECEIVE_SMS,
                Manifest.permission.INTERNET,
                Manifest.permission.ACCESS_FINE_LOCATION,
                Manifest.permission.ACCESS_COARSE_LOCATION
        };
        //2) 배열 체크 - 승인 : int PERMINSSION_GRANTED, 미승인 : int PackageManager.PERMISSION_DENIED
        for(int i = 0; i < permission.length; i++) {
            //권한 체크 - (checkSelfPermission(MainActivity.this, String permission[i]);
            int permChk = ContextCompat.checkSelfPermission(MainActivity.this, permission[i]);
            Toast.makeText(getApplicationContext(), permission[i] + "권한승인이 안되어 있습니다. 승인처리합니다.", Toast.LENGTH_SHORT).show();
            //권한 요청 - requestPermissions(Context context, permission, RequestCode)
            if(permChk != PackageManager.PERMISSION_GRANTED) {//PackageManager.PERMISSION_DENIED
                ActivityCompat.requestPermissions(MainActivity.this, permission, MY_PERMISSIONS_REQUEST_SMS_RECEIVE);
            }
        }
    }

    //앱이 실행되는 동안에만 방송수신을 하고 싶을때 : onResume()에서 연결 ~ onPause()에서 해제한다.
    public void onResume() {
        super.onResume();
        //1) 인텐트 필터
        IntentFilter filter = new IntentFilter();
        //2) 필요한 액션을 추가한다.
        filter.addAction("android.provider.Telephony.SMS_RECEIVED");
        //3) 등록한다. - 연결
        registerReceiver(receiver, filter);
    }

    public void onPause() {
        super.onPause();
        //4) 해제한다.
        unregisterReceiver(receiver);
    }

}
10. 브로드캐스트 - SD카드, 배터리
BroadcastReceiver3_SdcardBattery 프로젝트 만들기
- AndroidManifest.xml
<?xml version="1.0" encoding="utf-8"?>
<manifest xmlns:android="http://schemas.android.com/apk/res/android"
    package="com.example.broadcastreceiver3_sdcardbattery">

    <!--권한승인-->
    <uses-permission android:name="android.permission.BATTERY_STATS"/>
    <uses-permission android:name="android.permission.WRITE_EXTERNAL_STORAGE"/>

    <application
        android:allowBackup="true"
        android:icon="@mipmap/ic_launcher"
        android:label="@string/app_name"
        android:roundIcon="@mipmap/ic_launcher_round"
        android:supportsRtl="true"
        android:theme="@style/Theme.BroadcastReceiver3_SdcardBattery">
        <activity
            android:name=".MainActivity"
            android:exported="true">
            <intent-filter>
                <action android:name="android.intent.action.MAIN" />

                <category android:name="android.intent.category.LAUNCHER" />
            </intent-filter>
        </activity>
    </application>

</manifest>
- activity_main.xml
<?xml version="1.0" encoding="utf-8"?>
<LinearLayout xmlns:android="http://schemas.android.com/apk/res/android"
    android:layout_width="match_parent"
    android:layout_height="match_parent"
    android:orientation="vertical"
    android:padding="10dp">

    <TextView
        android:layout_width="match_parent"
        android:layout_height="wrap_content"
        android:text="밧데리와 외장메모리 이벤트 체크"
        android:layout_marginTop="50dp"
        android:textStyle="bold"
        android:textSize="25sp"
        android:textColor="#3F51B5"
        android:gravity="center_horizontal"/>

    <TextView
        android:id="@+id/textview"
        android:layout_width="wrap_content"
        android:layout_height="wrap_content"
        android:layout_gravity="center_horizontal"
        android:layout_marginTop="150sp"
        android:hint="발생 액션과  밧데리레벨이 출력됩니다. "
        android:textSize="20sp"/>

</LinearLayout>
- MainActivity.java
package com.example.broadcastreceiver3_sdcardbattery;

import androidx.appcompat.app.AppCompatActivity;

import android.content.BroadcastReceiver;
import android.content.Context;
import android.content.Intent;
import android.content.IntentFilter;
import android.os.BatteryManager;
import android.os.Bundle;
import android.widget.TextView;
import android.widget.Toast;

public class MainActivity extends AppCompatActivity {

    TextView textfield;

    @Override
    public void onCreate(Bundle savedInstanceState) {
        super.onCreate(savedInstanceState);
        setContentView(R.layout.activity_main);
        textfield = (TextView) findViewById(R.id.textview);
    }

    @Override
    public void onResume() {
        super.onResume();
        // 방송받을 이벤트들  필터에 추가
        IntentFilter filter = new IntentFilter();
        filter.addAction(Intent.ACTION_BATTERY_CHANGED);
        filter.addAction(Intent.ACTION_BATTERY_LOW);
        filter.addAction(Intent.ACTION_POWER_DISCONNECTED);
        filter.addAction(Intent.ACTION_POWER_CONNECTED);
        filter.addAction(Intent.ACTION_MEDIA_MOUNTED);
        filter.addAction(Intent.ACTION_MEDIA_REMOVED);
        registerReceiver(receiver, filter);
    }

    @Override
    public void onPause() {
        super.onPause();
        unregisterReceiver(receiver);
    }

    BroadcastReceiver receiver = new BroadcastReceiver() {

        @Override
        public void onReceive(Context context, Intent intent) {
            String action = intent.getAction();
            Toast.makeText(context, action, Toast.LENGTH_LONG).show();
            textfield.setText(action);
            if(action.equals(Intent.ACTION_BATTERY_CHANGED)) {
                int maxvalue=intent.getIntExtra(BatteryManager.EXTRA_SCALE, 0);
                int value = intent.getIntExtra(BatteryManager.EXTRA_LEVEL, 0);
                int level = value * 100 / maxvalue;
                textfield.setText(action + "\n현재 배터리 레벨="+ level);
            }else if(action.equals(Intent.ACTION_BATTERY_LOW)) {//밧데리가 부족하다면
                textfield.setText(action + "\n배터리 부족");
            }else if(action.equals(Intent.ACTION_MEDIA_MOUNTED)) {//SD카드를 장착했다면 (외부저장장치)
                textfield.setText(action + "\nSD카드 장착");
            }else if(action.equals(Intent.ACTION_MEDIA_REMOVED)) {//SD카드를 제거했다면 //오타!
                textfield.setText(action + "\nSD카드 장착 해제");
            }
        }

    };

}
11. 프로바이더 - 컨텐츠
Provider1_picture 프로젝트 만들기
애뮬레이터 핸드폰으로 찍은 사진 경로
storage/emulated/0/Pictures/사진파일
# 컨텐츠 제공자(Content Provider)
: 다른 애플리케이션에 데이터를 공급하는 역할을 하는 컴포넌트이다.
: 안드로이드에서는 저장된 데이터를 관계형 데이터베이스의 테이블 형태로 외부 애플리케이션에 제공한다.
: 데이터 계층과 애플리케이션 계층을 분리하는 역할을 한다.
(앱) (데이터)
<컨텐츠 제공자> ----- SQLite, File, XML 등
액티비티 -- (테이블) -- <insert>
<update>
<delete>
<query>
1. 원하는 컨텐츠를 찾기
-> getContentResolver() 호출 - Context 객체에 있는 ContextResolver 객체 - CRUD 기능을 제공
-> query(Uri, projection, selection, sortOrder)
Uri (FROM 테이블명 역할)
: 컨텐츠 제공자의 데이터 식별 Uri
: 문자열로 텍스트, 비디오, 사운드클립, 동영상같은 컨텐츠를 식별하는 규격이다.
: 안드로이드가 제공하는 Uri 객체 상수들
사용자 사전제공자 - UserDictionary.Words.CONTENT_URI
이미지 제공자 - MediaStore.Image.Media.EXTERNAL_CONTENT_URI
비디오 제공자 - MediaStore.Video.Media.EXTERNAL_CONTENT_URI
오디오 제공자 - MediaStore.Audio.Media.EXTERNAL_CONTENT_URI
등등...
projection : 반환되는 레코드에 포함된 필드의 이름 (FROM 앞 컬럼, 컬럼, 컬럼 역할)
String[] projection = new String[] {필드명(컬럼), 필드명(컬럼), ...}
selection : 행을 선택하는 조건 (WHERE절 역할)
sortOrder : 레코드 집합에서 행이 나타나는 순서를 지정 (ORDER BY 역할)
2. 제공자로부터 데이터 읽기
1) 권한등록(Manifest)
최근에는 자바 코드로 동적으로 권한을 요청하도록 하고 있다.
ActivityCompat.requestPermission(this, new String[]) {Manifest.permission.권한,,,}, 요청코드)
2) 쿼리작성 - 커서객체 반환
Cursor cursor = getContentResolver().query(Uri, projection, selection, sortOrder);
컬럼인덱스 얻기 : int index = cursor.getColumnIndex(컨텐츠 제공자)
인덱스로 데이터 읽기
: while(cursor.moveToNext()) {
data1 = cursor.getString(index)
data2 = cursor.getInt(index)
}
활용
- AndroidManifest.xml
<?xml version="1.0" encoding="utf-8"?>
<manifest xmlns:android="http://schemas.android.com/apk/res/android"
    package="com.example.provider1_picture">

    <uses-permission android:name="android.permission.WRITE_EXTERNAL_STORAGE"/>

    <application
        android:allowBackup="true"
        android:icon="@mipmap/ic_launcher"
        android:label="@string/app_name"
        android:roundIcon="@mipmap/ic_launcher_round"
        android:supportsRtl="true"
        android:theme="@style/Theme.Provider1_picture">
        <activity
            android:name=".MainActivity"
            android:exported="true">
            <intent-filter>
                <action android:name="android.intent.action.MAIN" />

                <category android:name="android.intent.category.LAUNCHER" />
            </intent-filter>
        </activity>
    </application>

</manifest>
- activity_main.xml
<LinearLayout xmlns:android="http://schemas.android.com/apk/res/android"
    android:orientation="vertical"
    android:layout_width="match_parent"
    android:layout_height="match_parent"
    android:gravity="center_horizontal"
    android:padding="10dp">

    <LinearLayout
        android:orientation="horizontal"
        android:layout_width="match_parent"
        android:layout_height="wrap_content"
        android:layout_marginBottom="10dp">

        <Button
            android:id="@+id/previous"
            android:layout_width="0dp"
            android:layout_height="wrap_content"
            android:layout_marginRight="5dp"
            android:layout_weight="4"
            android:backgroundTint="#FF9800"
            android:onClick="displayFirstImage"
            android:text="previous"></Button>

        <Button
            android:id="@+id/next"
            android:layout_width="0dp"
            android:layout_height="wrap_content"
            android:layout_weight="4"
            android:backgroundTint="#009688"
            android:onClick="displaySecondImage"
            android:text="next"></Button>
    </LinearLayout>

    <ImageView android:id="@+id/picture"
        android:layout_width="match_parent"
        android:layout_height="match_parent"
        android:layout_marginBottom="10dp">
    </ImageView>

</LinearLayout>
- MainActivity.java
package com.example.provider1_picture;

import android.Manifest;
import android.database.Cursor;
import android.graphics.Bitmap;
import android.graphics.BitmapFactory;
import android.os.Bundle;
import android.provider.MediaStore;
import android.view.View;
import android.widget.ImageView;
import android.widget.Toast;
import androidx.appcompat.app.AppCompatActivity;
import androidx.core.app.ActivityCompat;
import java.io.File;


public class MainActivity extends AppCompatActivity {

    private Cursor cursor;
    ImageView imageView;

    @Override
    protected void onCreate(Bundle savedInstanceState) {
        super.onCreate(savedInstanceState);
        setContentView(R.layout.activity_main);
        imageView = (ImageView) findViewById(R.id.picture);
        //동적으로 권한요청
        ActivityCompat.requestPermissions(this, new String[]{Manifest.permission.WRITE_EXTERNAL_STORAGE}, 1);
    }

    public void displayFirstImage(View v) {
        Toast.makeText(getApplicationContext(), "displayFirstImage()", Toast.LENGTH_LONG).show();
        try {
            String[] projection = new String[] {
                MediaStore.Images.ImageColumns._ID,
                MediaStore.Images.ImageColumns.DATA
            };

            cursor = getContentResolver().query(MediaStore.Images.Media.EXTERNAL_CONTENT_URI,
                    projection,
                    null,
                    null,
                    null);

            int size = cursor.getCount();
            if(size == 0) {
                Toast.makeText(getApplicationContext(), "장치에 이미지가 없음!", Toast.LENGTH_LONG).show();
            }else {
                if(cursor.moveToFirst()) {
                    String imageLocation = cursor.getString(1); //두번째의 MediaStore.Images.ImageColumns.DATA
                    Toast.makeText(getApplicationContext(), imageLocation, Toast.LENGTH_LONG).show();
                    File imageFile = new File(imageLocation);
                    if(imageFile.exists()) {
                        Bitmap bm = BitmapFactory.decodeFile(imageLocation);
                        imageView.setImageBitmap(bm);
                    }
                }
            }
        }catch(Exception e) {
            e.printStackTrace();
        }
    }

    public void displaySecondImage(View v) {
        Toast.makeText(getApplicationContext(), "displayFirstImage()", Toast.LENGTH_LONG).show();
        try {
            String[] projection = new String[] {
                    MediaStore.Images.ImageColumns._ID,
                    MediaStore.Images.ImageColumns.DATA,
                    MediaStore.Images.ImageColumns.BUCKET_DISPLAY_NAME,
                    MediaStore.Images.ImageColumns.DATE_TAKEN,
                    MediaStore.Images.ImageColumns.MIME_TYPE
            };
            cursor = getContentResolver().query(MediaStore.Images.Media.EXTERNAL_CONTENT_URI,
                    projection,
                    null,
                    null,
                    null);
            int size = cursor.getCount();
            if(size == 0) {
                Toast.makeText(getApplicationContext(), "장치에 이미지가 없음!", Toast.LENGTH_LONG).show();
            }else {
                if (cursor.moveToLast()) {
                    String imageLocation = cursor.getString(1);
                    Toast.makeText(getApplicationContext(), imageLocation, Toast.LENGTH_LONG).show();
                    //파일 생성
                    File imageFile = new File(imageLocation);
                    if(imageFile.exists()) {
                        //비트맵 출력
                        Bitmap bm = BitmapFactory.decodeFile(imageLocation);
                        imageView.setImageBitmap(bm);
                    }
                }
            }
        }catch (Exception e) {
            e.printStackTrace();
        }
    }

}
12. 프로바이더 - 비디오 목록 뷰
Provider2_VideoListView 프로젝트 만들기
- AndroidManifest.xml
<?xml version="1.0" encoding="utf-8"?>
<manifest xmlns:android="http://schemas.android.com/apk/res/android"
    package="com.example.provider2_videolistview">

    <!-- 권한승인-->
    <uses-permission android:name="android.permission.READ_EXTERNAL_STORAGE"/>
    <uses-permission android:name="android.permission.WRITE_EXTERNAL_STORAGE"/>

    <application
        android:allowBackup="true"
        android:icon="@mipmap/ic_launcher"
        android:label="@string/app_name"
        android:roundIcon="@mipmap/ic_launcher_round"
        android:supportsRtl="true"
        android:theme="@style/Theme.Provider2_VideoListView">
        <activity
            android:name=".MainActivity"
            android:exported="true">
            <intent-filter>
                <action android:name="android.intent.action.MAIN" />

                <category android:name="android.intent.category.LAUNCHER" />
            </intent-filter>
        </activity>
    </application>

</manifest>
- activity_main.xml
<?xml version="1.0" encoding="utf-8"?>
<LinearLayout xmlns:android="http://schemas.android.com/apk/res/android"
    android:layout_width="match_parent"
    android:layout_height="match_parent"
    android:orientation="vertical"
    android:padding="10dp"
    android:gravity="center_horizontal">

    <TextView
        android:id="@+id/textView"
        android:layout_width="match_parent"
        android:layout_height="wrap_content"
        android:gravity="center_horizontal"
        android:text="All Video Files"
        android:textColor="#3F51B5"
        android:textSize="34sp"
        android:textStyle="italic"/>

    <Button
        android:id="@+id/button"
        android:layout_width="wrap_content"
        android:layout_height="wrap_content"
        android:backgroundTint="#FF9800"
        android:layout_marginTop="50dp"
        android:onClick="onClick"
        android:text="모든 비디오 제목 표시" />

    <ListView
        android:id="@+id/listview"
        android:layout_width="match_parent"
        android:layout_height="match_parent"
        android:layout_marginTop="50dp"/>

</LinearLayout>
- MainActivity.java
package com.example.provider2_videolistview;

import androidx.appcompat.app.AppCompatActivity;
import androidx.core.app.ActivityCompat;

import android.Manifest;
import android.annotation.SuppressLint;
import android.content.ContentResolver;
import android.database.Cursor;
import android.net.Uri;
import android.os.Bundle;
import android.provider.MediaStore;
import android.util.Log;
import android.view.View;
import android.widget.ArrayAdapter;
import android.widget.ListView;
import android.widget.Toast;

import java.util.ArrayList;
import java.util.List;

public class MainActivity extends AppCompatActivity {

    ArrayList<String> list ;
    ListView listview ;

    @Override
    protected void onCreate(Bundle savedInstanceState) {
        super.onCreate(savedInstanceState);
        setContentView(R.layout.activity_main);

        list = new ArrayList<>();
        listview = (ListView) findViewById(R.id.listview);
        ActivityCompat.requestPermissions(this, new String[]{Manifest.permission.WRITE_EXTERNAL_STORAGE}, 1);
    }

    public void onClick(View v) {
        ContentResolver resolver = getContentResolver();
        Uri uri = MediaStore.Video.Media.EXTERNAL_CONTENT_URI;
        Cursor cursor = resolver.query(uri, null, null, null, null);
        if(cursor != null && cursor.moveToFirst()) {
            do{
                int index = cursor.getColumnIndexOrThrow(MediaStore.Video.Media.DISPLAY_NAME);
                list.add(cursor.getString(index));
            } while (cursor.moveToNext());
        }
        ArrayAdapter<String> adapter = new ArrayAdapter<>(this, android.R.layout.simple_list_item_1, android.R.id.text1, list);
        listview.setAdapter(adapter);
    }

}
13. 맵 - getLocation
Map1_getLocation 프로젝트 만들기
- AndroidManifest.xml
<?xml version="1.0" encoding="utf-8"?>
<manifest xmlns:android="http://schemas.android.com/apk/res/android"
    package="com.example.map1_getlocation">

    <!--권한승인-->
    <uses-permission android:name="android.permission.ACCESS_FINE_LOCATION"/>
    <uses-permission android:name="android.permission.ACCESS_COARSE_LOCATION"/>

    <application
        android:allowBackup="true"
        android:icon="@mipmap/ic_launcher"
        android:label="@string/app_name"
        android:roundIcon="@mipmap/ic_launcher_round"
        android:supportsRtl="true"
        android:theme="@style/Theme.Map1_getLocation">
        <activity
            android:name=".MainActivity"
            android:exported="true">
            <intent-filter>
                <action android:name="android.intent.action.MAIN" />

                <category android:name="android.intent.category.LAUNCHER" />
            </intent-filter>
        </activity>
    </application>

</manifest>
- activity_main.xml
<?xml version="1.0" encoding="utf-8"?>
<LinearLayout xmlns:android="http://schemas.android.com/apk/res/android"
    android:layout_width="match_parent"
    android:layout_height="match_parent"
    android:orientation="vertical"
    android:padding="10dp">

    <TextView
        android:layout_width="match_parent"
        android:layout_height="wrap_content"
        android:layout_marginTop="50dp"
        android:text="내가있는 위치정보"
        android:textSize="25sp"
        android:textStyle="bold|italic"
        android:textColor="#3F51B5"
        android:gravity="center_horizontal"/>

    <TextView
        android:id="@+id/status"
        android:layout_width="match_parent"
        android:layout_height="wrap_content"
        android:gravity="center_horizontal"
        android:padding="30dp"
        android:layout_marginTop="50dp"
        android:includeFontPadding="true"
        android:text="아직 수신되지 않았음.기다려주세요..."
        android:textSize="15sp"
        android:textStyle="italic"
        android:typeface="serif"/>

</LinearLayout>
- MainActivity.java
package com.example.map1_getlocation;

// 소스만 입력하고 Alt+Enter를 눌러서 import 문장을 자동으로 생성한다.

import android.Manifest;
import android.content.Context;
import android.content.pm.PackageManager;
import android.location.Location;
import android.location.LocationListener;
import android.location.LocationManager;
import android.os.Bundle;
import android.widget.TextView;
import android.widget.Toast;
import androidx.appcompat.app.AppCompatActivity;
import androidx.core.app.ActivityCompat;

/*
   사용자 위치가져오기
    0. 매니페스트에 권한등록
    1. 동적으로 권한 부여
    2. LocationManager 객체생성 : getSystemService( Context.LOCATION_SERVICE )
    3. LocationListener  인터페이스 객체생성
    4. 위치가 변하면 자동으로 호출되는 콜백메소드 : 변했을때 할 일을 코드구현 : onLocationChanged(Location location)
    5. 위치를 업데이트받기위해 리스너를 LocationManager에게 등록:
       >> locationManager.requestLocationUpdates( LocationManager . GPS_PROVIDER, 0 , 0 , locationListener )
          . GPS콘텐트제공자 : LocationManager
          .  0 : 최소시간간격 (밀리초)
          .  0:  최소거리간격 (미터)
          . locationListener : 리스너
*/

public class MainActivity extends AppCompatActivity {

    //RequestCode 값
    private int MY_PERMISSIONS_REQUEST_LOCATION = 10;
    TextView status;

    public void onCreate(Bundle savedInstanceState) {
        super.onCreate(savedInstanceState);
        setContentView(R.layout.activity_main);

        status = (TextView) findViewById(R.id.status);
        //1. 동적으로 권한 부여
        //권한부여
        ActivityCompat.requestPermissions(this, new String[]{Manifest.permission.ACCESS_FINE_LOCATION}, MY_PERMISSIONS_REQUEST_LOCATION);
        //2. LocationManager 객체생성 : getSystemService( Context.LOCATION_SERVICE )
        LocationManager locationManager = (LocationManager) this.getSystemService(Context.LOCATION_SERVICE);
        //3. LocationListener 인터페이스 객체생성
        LocationListener locationListener = new LocationListener() {
            //4. 위치가 변하면 자동으로 호출되는 콜백메소드 : 변했을때 할 일을 코드구현
            public void onLocationChanged(Location location) {
                status.setText("위도; " + location.getLatitude() + "\n경도:"
                        + location.getLongitude() + "\n고도:"
                        + location.getAltitude());
            }
            //나머지 콜백메소드 그냥둔다.
            public void onStatusChanged(String provider, int status, Bundle extras) {}
            public void onProviderEnabled(String provider) {}
            public void onProviderDisabled(String provider) {}
        };

        //여기서 다시한번 권한체크 - 안되어 있으면 경고 토스트
        if(ActivityCompat.checkSelfPermission(this, android.Manifest.permission.ACCESS_FINE_LOCATION) != PackageManager.PERMISSION_GRANTED
        && ActivityCompat.checkSelfPermission(this, android.Manifest.permission.ACCESS_COARSE_LOCATION) != PackageManager.PERMISSION_GRANTED) {
            Toast.makeText(MainActivity.this, "First enable LOCATION ACCESS in settings.", Toast.LENGTH_LONG).show();
            return;
        }

        //5. 위치를 업데이트 받기위해 리스너를 LocationManager에게 등록
        locationManager.requestLocationUpdates(LocationManager.GPS_PROVIDER, 0, 0, locationListener);

    }

}
'교육 정리 > 안드로이드 앱 제작(Java)' 카테고리의 다른 글
| 5일차. 프래그먼트, 어댑터뷰, 리사이클러, 뷰 페이저, 액티비티와 인텐트, 데이터 저장과 관리 (0) | 2022.11.05 |
|---|---|
| 4일차. 그래픽과 이미지 (2) | 2022.10.29 |
| 3일차. 레이아웃 익히기2, 이벤트, 고급 위젯 다루기 (2) | 2022.10.22 |
| 2일차. 레이아웃 익히기, 고급위젯 다루기 (2) | 2022.10.08 |
| 1일차. 안드로이드의 개요와 개발환경 설치, 안드로이드 애플리케이션, Java 문법, 기본 위젯 익히기 (0) | 2022.10.01 |


댓글