버츄얼 디바이스 켜기
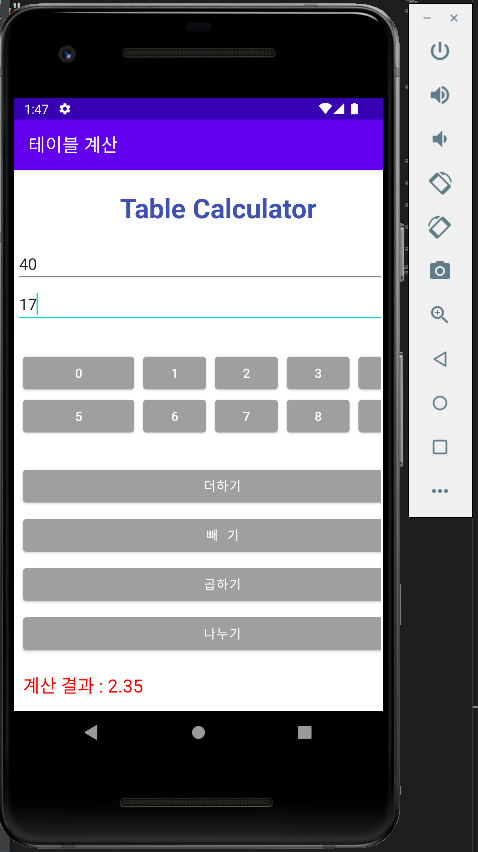
1. 테이블 레이아웃 계산기 앱 만들기
Ch2_App6_TableCalculator 프로젝트 만들기
테이블 레이아웃은 위젯을 표형태로 배치할 때 사용.
- activity_main.xml
<?xml version="1.0" encoding="utf-8"?>
<TableLayout xmlns:android="http://schemas.android.com/apk/res/android"
    android:layout_width="match_parent"
    android:layout_height="match_parent"
    android:padding="2dp">

    <TableRow>
        <TextView
            android:layout_width="match_parent"
            android:layout_height="wrap_content"
            android:layout_marginTop="20dp"
            android:layout_span="5"
            android:text="Table Calculator"
            android:gravity="center_horizontal"
            android:textSize="30sp"
            android:textStyle="bold"
            android:textColor="#3F51B5"/>
    </TableRow>
    <TableRow
        android:layout_marginTop="20dp">
        <EditText
            android:id="@+id/edit1"
            android:layout_span="5"
            android:hint="숫자1 입력"/>
    </TableRow>
    <TableRow>
        <EditText
            android:id="@+id/edit2"
            android:layout_span="5"
            android:hint="숫자2 입력"/>
    </TableRow>
    <TableRow
        android:layout_marginTop="30dp">
        <Button
            android:id="@+id/btnNum0"
            android:layout_width="70dp"
            android:layout_height="wrap_content"
            android:backgroundTint="#A19EA1"
            android:layout_marginLeft="8dp"
            android:layout_marginRight="10dp"
            android:text="0"/>
        <Button
            android:id="@+id/btnNum1"
            android:layout_width="70dp"
            android:layout_height="wrap_content"
            android:backgroundTint="#A19EA1"
            android:layout_marginRight="10dp"
            android:text="1"/>
        <Button
            android:id="@+id/btnNum2"
            android:layout_width="70dp"
            android:layout_height="wrap_content"
            android:backgroundTint="#A19EA1"
            android:layout_marginRight="10dp"
            android:text="2"/>
        <Button
            android:id="@+id/btnNum3"
            android:layout_width="70dp"
            android:layout_height="wrap_content"
            android:backgroundTint="#A19EA1"
            android:layout_marginRight="10dp"
            android:text="3"/>
        <Button
            android:id="@+id/btnNum4"
            android:layout_width="70dp"
            android:layout_height="wrap_content"
            android:backgroundTint="#A19EA1"
            android:text="4"/>
    </TableRow>
    <TableRow>
        <Button
            android:id="@+id/btnNum5"
            android:layout_width="70dp"
            android:layout_height="wrap_content"
            android:backgroundTint="#A19EA1"
            android:layout_marginLeft="8dp"
            android:layout_marginRight="10dp"
            android:text="5"/>
        <Button
            android:id="@+id/btnNum6"
            android:layout_width="70dp"
            android:layout_height="wrap_content"
            android:backgroundTint="#A19EA1"
            android:layout_marginRight="10dp"
            android:text="6"/>
        <Button
            android:id="@+id/btnNum7"
            android:layout_width="70dp"
            android:layout_height="wrap_content"
            android:backgroundTint="#A19EA1"
            android:layout_marginRight="10dp"
            android:text="7"/>
        <Button
            android:id="@+id/btnNum8"
            android:layout_width="70dp"
            android:layout_height="wrap_content"
            android:backgroundTint="#A19EA1"
            android:layout_marginRight="10dp"
            android:text="8"/>
        <Button
            android:id="@+id/btnNum9"
            android:layout_width="70dp"
            android:layout_height="wrap_content"
            android:backgroundTint="#A19EA1"
            android:text="9"/>
    </TableRow>
    <TableRow>
        <Button
            android:id="@+id/btnAdd"
            android:layout_width="match_parent"
            android:layout_height="wrap_content"
            android:backgroundTint="#A19EA1"
            android:layout_marginLeft="8dp"
            android:layout_marginTop="30dp"
            android:layout_span="5"
            android:text="더하기"/>
    </TableRow>
    <TableRow>
        <Button
            android:id="@+id/btnSub"
            android:layout_width="match_parent"
            android:layout_height="wrap_content"
            android:backgroundTint="#A19EA1"
            android:layout_marginLeft="8dp"
            android:layout_marginTop="7dp"
            android:layout_span="5"
            android:text="빼  기"/>
    </TableRow>
    <TableRow>
        <Button
            android:id="@+id/btnMul"
            android:layout_width="match_parent"
            android:layout_height="wrap_content"
            android:backgroundTint="#A19EA1"
            android:layout_marginLeft="8dp"
            android:layout_marginTop="7dp"
            android:layout_span="5"
            android:text="곱하기"/>
    </TableRow>
    <TableRow>
        <Button
            android:id="@+id/btnDiv"
            android:layout_width="match_parent"
            android:layout_height="wrap_content"
            android:backgroundTint="#A19EA1"
            android:layout_marginLeft="8dp"
            android:layout_marginTop="7dp"
            android:layout_span="5"
            android:text="나누기"/>
    </TableRow>
    <TableRow>
        <TextView
            android:id="@+id/textResult"
            android:layout_marginTop="20dp"
            android:layout_marginLeft="8dp"
            android:text="계산 결과 : "
            android:textColor="#ff0000"
            android:textSize="20dp"/>
    </TableRow>
</TableLayout>
- MainActivity.java
package com.example.ch2_app6_tablecalculator;

import androidx.appcompat.app.AppCompatActivity;

import android.os.Bundle;
import android.view.MotionEvent;
import android.view.View;
import android.widget.Button;
import android.widget.EditText;
import android.widget.TextView;
import android.widget.Toast;

import java.text.DecimalFormat;

public class MainActivity extends AppCompatActivity {

    //전역 변수 선언
    EditText editText1, editText2;
    Button btnAdd, btnSub, btnMul, btnDiv;
    TextView textResult;

    //EditText에서 넘어올 때 String으로 넘어옴
    String num1, num2;
    Integer result;

    //버튼 숫자 가져옴
    Integer[] numBtnIDs = {
        R.id.btnNum0, R.id.btnNum1, R.id.btnNum2, R.id.btnNum3, R.id.btnNum4,
        R.id.btnNum5, R.id.btnNum6, R.id.btnNum7, R.id.btnNum8, R.id.btnNum9
    };

    //배열 인덱스
    int i;

    @Override
    protected void onCreate(Bundle savedInstanceState) {
        super.onCreate(savedInstanceState);
        setContentView(R.layout.activity_main);

        setTitle("테이블 계산");
        //xml에서 가져온 객체
        //가져올 때 상수로 가져온다(int)
        editText1 = (EditText)findViewById(R.id.edit1);
        editText2 = (EditText)findViewById(R.id.edit2);
        btnAdd = (Button)findViewById(R.id.btnAdd);
        btnSub = (Button)findViewById(R.id.btnSub);
        btnMul = (Button)findViewById(R.id.btnMul);
        btnDiv = (Button)findViewById(R.id.btnDiv);
        textResult = (TextView)findViewById(R.id.textResult);

        //더하기
        btnAdd.setOnTouchListener(new View.OnTouchListener() {//자바 내부 익명 클래스로 구현
            @Override
            public boolean onTouch(View view, MotionEvent motionEvent) {
                num1 = editText1.getText().toString(); //문자로 바꿔야 함
                num2 = editText2.getText().toString();
                result = Integer.parseInt(num1) + Integer.parseInt(num2); //계산시 숫자로
                textResult.setText("계산 결과 : " + result.toString()); //출력시 문자로
                return false;
            }
        });
        //빼기
        btnSub.setOnTouchListener(new View.OnTouchListener() {
            @Override
            public boolean onTouch(View view, MotionEvent motionEvent) {
                num1 = editText1.getText().toString();
                num2 = editText2.getText().toString();
                result = Integer.parseInt(num1) - Integer.parseInt(num2);
                textResult.setText("계산 결과 : " + result.toString());
                return false;
            }
        });
        //곱하기
        btnMul.setOnTouchListener(new View.OnTouchListener() {
            @Override
            public boolean onTouch(View view, MotionEvent motionEvent) {
                num1 = editText1.getText().toString();
                num2 = editText2.getText().toString();
                result = Integer.parseInt(num1) * Integer.parseInt(num2);
                textResult.setText("계산 결과 : " + result.toString());
                return false;
            }
        });
        //나누기
        btnDiv.setOnTouchListener(new View.OnTouchListener() {
            @Override
            public boolean onTouch(View view, MotionEvent motionEvent) {
                num1 = editText1.getText().toString();
                num2 = editText2.getText().toString();
                //result = Integer.parseInt(num1) / Integer.parseInt(num2);
                Double r = Double.parseDouble(num1) / Double.parseDouble(num2);
                //소수점포맷
                DecimalFormat df = new DecimalFormat("#,###.##");
                String re = df.format(r);
                textResult.setText("계산 결과 : " + re);
                return false;
            }
        });

        //숫자버튼을 활용한 숫자입력 처리
        Button[] numButtons = new Button[10];
        for(i=0 ; i < numButtons.length ; i++) {//배열 가져오기
            numButtons[i] = (Button)findViewById(numBtnIDs[i]);
        }
        for(i=0 ; i < numBtnIDs.length ; i++) {
            final int index;
            index = i;
            numButtons[i].setOnClickListener(new View.OnClickListener() {
                @Override
                public void onClick(View view) {
                    if(editText1.isFocused() == true) {//첫번째 숫자 입력항목 포커스
                        num1 = editText1.getText().toString() + numButtons[index].getText().toString(); //기존값 + 버튼값
                        editText1.setText(num1);
                    }else if(editText2.isFocused() == true) {//두번째 숫자 입력항목 포커스
                        num2 = editText2.getText().toString() + numButtons[index].getText().toString(); //기존값 + 버튼값
                        editText2.setText(num2);
                    }else {//포커스가 없을 때
                        Toast.makeText(getApplicationContext(), "먼저 에디트텍스트를 선택해주세요.", Toast.LENGTH_SHORT).show();
                    }
                }
            });
        }
    }

}
2. 그리드 레이아웃 프론트 만들기
Ch2_App7_GridCalculator 프로젝트 만들기
테이블 레이아웃과 비슷하지만, 각각의 자식 뷰가 자신의 위치와 차지하는 셀의 개수를 독립적으로 지정할 수 있다.
span 이후 android:layout_gravity="fill_horizontal" 로 채우기!
gravity 속성없다.
백단은 집에서 만들어 보기
- activity_main.xml
<?xml version="1.0" encoding="utf-8"?>
<GridLayout xmlns:android="http://schemas.android.com/apk/res/android"
    android:layout_width="match_parent"
    android:layout_height="match_parent"
    android:rowCount="9"
    android:columnCount="5"
    android:layout_marginTop="30dp"
    android:layout_marginBottom="2dp"
    android:layout_margin="10dp">

    <EditText
        android:id="@+id/edit1"
        android:layout_width="match_parent"
        android:layout_height="wrap_content"
        android:layout_row="0"
        android:layout_column="0"
        android:layout_columnSpan="5"
        android:layout_gravity="fill_horizontal"
        android:gravity="center"
        android:hint="첫번째 숫자"/>

    <EditText
        android:id="@+id/edit2"
        android:layout_width="match_parent"
        android:layout_height="wrap_content"
        android:layout_row="1"
        android:layout_column="0"
        android:layout_columnSpan="5"
        android:layout_gravity="fill_horizontal"
        android:gravity="center"
        android:hint="두번째 숫자"/>

    <Button
        android:id="@+id/btnNum0"
        android:layout_width="57dp"
        android:layout_height="wrap_content"
        android:layout_row="2"
        android:layout_column="0"
        android:layout_marginTop="10dp"
        android:layout_margin="5dp"
        android:text="0"/>
    <Button
        android:id="@+id/btnNum1"
        android:layout_width="57dp"
        android:layout_height="wrap_content"
        android:layout_row="2"
        android:layout_column="1"
        android:layout_marginTop="10dp"
        android:layout_margin="5dp"
        android:text="1"/>
    <Button
        android:id="@+id/btnNum2"
        android:layout_width="57dp"
        android:layout_height="wrap_content"
        android:layout_row="2"
        android:layout_column="2"
        android:layout_marginTop="10dp"
        android:layout_margin="5dp"
        android:text="2"/>
    <Button
        android:id="@+id/btnNum3"
        android:layout_width="57dp"
        android:layout_height="wrap_content"
        android:layout_row="2"
        android:layout_column="3"
        android:layout_marginTop="10dp"
        android:layout_margin="5dp"
        android:text="3"/>
    <Button
        android:id="@+id/btnNum4"
        android:layout_width="57dp"
        android:layout_height="wrap_content"
        android:layout_row="2"
        android:layout_column="4"
        android:layout_marginTop="10dp"
        android:layout_margin="5dp"
        android:text="4"/>

    <Button
        android:id="@+id/btnNum5"
        android:layout_width="57dp"
        android:layout_height="wrap_content"
        android:layout_row="3"
        android:layout_column="0"
        android:layout_marginTop="10dp"
        android:layout_margin="5dp"
        android:text="5"/>
    <Button
        android:id="@+id/btnNum6"
        android:layout_width="57dp"
        android:layout_height="wrap_content"
        android:layout_row="3"
        android:layout_column="1"
        android:layout_marginTop="10dp"
        android:layout_margin="5dp"
        android:text="6"/>
    <Button
        android:id="@+id/btnNum7"
        android:layout_width="57dp"
        android:layout_height="wrap_content"
        android:layout_row="3"
        android:layout_column="2"
        android:layout_marginTop="10dp"
        android:layout_margin="5dp"
        android:text="7"/>
    <Button
        android:id="@+id/btnNum8"
        android:layout_width="57dp"
        android:layout_height="wrap_content"
        android:layout_row="3"
        android:layout_column="3"
        android:layout_marginTop="10dp"
        android:layout_margin="5dp"
        android:text="8"/>
    <Button
        android:id="@+id/btnNum9"
        android:layout_width="57dp"
        android:layout_height="wrap_content"
        android:layout_row="3"
        android:layout_column="4"
        android:layout_marginTop="10dp"
        android:layout_margin="5dp"
        android:text="9"/>

    <Button
        android:id="@+id/btnAdd"
        android:layout_row="4"
        android:layout_column="0"
        android:layout_columnSpan="5"
        android:layout_gravity="fill_horizontal"
        android:layout_width="wrap_content"
        android:layout_height="wrap_content"
        android:layout_marginTop="10dp"
        android:layout_marginLeft="5dp"
        android:layout_marginRight="5dp"
        android:text="더하기"/>
    <Button
        android:id="@+id/btnSub"
        android:layout_row="5"
        android:layout_column="0"
        android:layout_columnSpan="5"
        android:layout_gravity="fill_horizontal"
        android:layout_width="wrap_content"
        android:layout_height="wrap_content"
        android:layout_marginTop="10dp"
        android:layout_marginLeft="5dp"
        android:layout_marginRight="5dp"
        android:text="빼  기"/>
    <Button
        android:id="@+id/btnMul"
        android:layout_row="6"
        android:layout_column="0"
        android:layout_columnSpan="5"
        android:layout_gravity="fill_horizontal"
        android:layout_width="wrap_content"
        android:layout_height="wrap_content"
        android:layout_marginTop="10dp"
        android:layout_marginLeft="5dp"
        android:layout_marginRight="5dp"
        android:text="곱하기"/>
    <Button
        android:id="@+id/btnDiv"
        android:layout_row="7"
        android:layout_column="0"
        android:layout_columnSpan="5"
        android:layout_gravity="fill_horizontal"
        android:layout_width="wrap_content"
        android:layout_height="wrap_content"
        android:layout_marginTop="10dp"
        android:layout_marginLeft="5dp"
        android:layout_marginRight="5dp"
        android:text="나누기"/>

    <TextView
        android:layout_width="wrap_content"
        android:layout_height="wrap_content"
        android:layout_row="8"
        android:layout_column="0"
        android:layout_columnSpan="2"
        android:layout_gravity="fill_horizontal"
        android:text="계산 결과 : "
        android:textStyle="bold"
        android:textSize="20sp"
        android:textColor="#f50424"
        android:layout_marginTop="10dp"
        android:layout_marginLeft="5dp"
        android:layout_marginRight="5dp"/>
    <EditText
        android:id="@+id/result"
        android:layout_width="wrap_content"
        android:layout_height="wrap_content"
        android:layout_row="8"
        android:layout_column="2"
        android:layout_columnSpan="3"
        android:layout_gravity="fill_horizontal"
        android:gravity="center"
        android:textColor="#041cf5"
        android:textSize="20sp"
        android:layout_marginTop="10dp"
        android:layout_marginLeft="5dp"/>

</GridLayout>
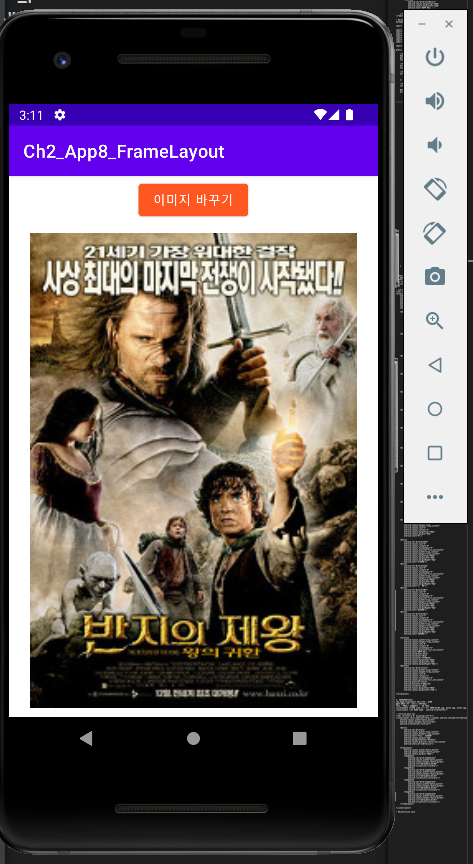
3. 프레임레이아웃
Ch2_App8_FrameLayout 프로젝트 만들기
가장 기본적이고 단순한 레이아웃
특징 : 겹쳐서 나타나게 할 수 있다.
res/drawable 폴더에 사진 파일 4개 넣기(mov05.jpg, mov24.jpg, mov32.jpg, mov51.jpg)
LinearLayout 태그 필수 속성은 android:orientation=""
- activity_main.xml
<?xml version="1.0" encoding="utf-8"?>
<LinearLayout xmlns:android="http://schemas.android.com/apk/res/android"
    android:layout_width="match_parent"
    android:layout_height="match_parent"
    android:orientation="vertical">

    <Button
        android:id="@+id/btn"
        android:layout_width="wrap_content"
        android:layout_height="wrap_content"
        android:text="이미지 바꾸기"
        android:layout_margin="3dp"
        android:backgroundTint="#ff5722"
        android:layout_gravity="center_horizontal"
        android:onClick="onBtnClick"/>

    <FrameLayout
        android:layout_width="match_parent"
        android:layout_height="match_parent"
        android:layout_margin="10dp">
        <ImageView
            android:id="@+id/imageView1"
            android:layout_width="match_parent"
            android:layout_height="match_parent"
            android:src="@drawable/mov05"
            android:visibility="visible"/>
        <ImageView
            android:id="@+id/imageView2"
            android:layout_width="match_parent"
            android:layout_height="match_parent"
            android:src="@drawable/mov24"
            android:visibility="invisible"/>
        <ImageView
            android:id="@+id/imageView3"
            android:layout_width="match_parent"
            android:layout_height="match_parent"
            android:src="@drawable/mov32"
            android:visibility="invisible"/>
        <ImageView
            android:id="@+id/imageView4"
            android:layout_width="match_parent"
            android:layout_height="match_parent"
            android:src="@drawable/mov51"
            android:visibility="invisible"/>
    </FrameLayout>

</LinearLayout>
- MainActivity.java
package com.example.ch2_app8_framelayout;

import androidx.appcompat.app.AppCompatActivity;

import android.os.Bundle;
import android.view.View;
import android.widget.ImageView;

public class MainActivity extends AppCompatActivity {

    //전역 변수 선언
    ImageView imageView1, imageView2, imageView3, imageView4;
    int imgeIndex = 0;

    @Override
    protected void onCreate(Bundle savedInstanceState) {
        super.onCreate(savedInstanceState);
        setContentView(R.layout.activity_main);

        //xml에서 가져온 객체
        imageView1 = (ImageView)findViewById(R.id.imageView1);
        imageView2 = (ImageView)findViewById(R.id.imageView2);
        imageView3 = (ImageView)findViewById(R.id.imageView3);
        imageView4 = (ImageView)findViewById(R.id.imageView4);
    }

    /**
     * onClick 이벤트로 호출되는 메서드
     */
    public void onBtnClick(View v) {
        changeImge();
    }

    /**
     * 실제 기능구현 메서드
     */
    public void changeImge() {
        if(imgeIndex == 0) {
            imageView1.setVisibility(View.VISIBLE);
            imageView2.setVisibility(View.INVISIBLE);
            imageView3.setVisibility(View.INVISIBLE);
            imageView4.setVisibility(View.INVISIBLE);
            imgeIndex = 1;
        }else if(imgeIndex == 1) {
            imageView1.setVisibility(View.INVISIBLE);
            imageView2.setVisibility(View.VISIBLE);
            imageView3.setVisibility(View.INVISIBLE);
            imageView4.setVisibility(View.INVISIBLE);
            imgeIndex = 2;
        }else if(imgeIndex == 2) {
            imageView1.setVisibility(View.INVISIBLE);
            imageView2.setVisibility(View.INVISIBLE);
            imageView3.setVisibility(View.VISIBLE);
            imageView4.setVisibility(View.INVISIBLE);
            imgeIndex = 3;
        }else {
            imageView1.setVisibility(View.INVISIBLE);
            imageView2.setVisibility(View.INVISIBLE);
            imageView3.setVisibility(View.INVISIBLE);
            imageView4.setVisibility(View.VISIBLE);
            imgeIndex = 0;
        }
    }

}
※ 연습문제 6, 7은 강사님이 자바 소스 보내주셨다.
- 6번 문제
- activity_main.xml
<LinearLayout xmlns:android="http://schemas.android.com/apk/res/android"
    android:id="@+id/layout1"
    android:layout_width="match_parent"
    android:layout_height="match_parent"
    android:background="#B67BB6"
    android:gravity="center"
    android:orientation="horizontal" >

    <LinearLayout
        android:id="@+id/layout2"
        android:layout_width="250dp"
        android:layout_height="250dp"
        android:background="#0000ff"
        android:gravity="center"
        android:orientation="vertical" >

        <LinearLayout
            android:id="@+id/layout3"
            android:layout_width="150dp"
            android:layout_height="150dp"
            android:background="#ffff00"
            android:gravity="center"
            android:orientation="vertical" >

            <LinearLayout
                android:id="@+id/layout4"
                android:layout_width="50dp"
                android:layout_height="50dp"
                android:background="#000000"
                android:gravity="center"
                android:orientation="vertical" >
            </LinearLayout>
        </LinearLayout>
    </LinearLayout>

</LinearLayout>
- MainActivity.java
package com.example.ch4_layoutex5_6;
import android.os.Bundle;
import androidx.appcompat.app.AppCompatActivity;
import android.view.View;
import android.widget.LinearLayout;
import android.widget.Toast;

public class MainActivity extends AppCompatActivity {
    LinearLayout layout1, layout2, layout3, layout4;

    @Override
    public void onCreate(Bundle savedInstanceState) {
        super.onCreate(savedInstanceState);
        setContentView(R.layout.activity_main);
        setTitle("연습문제 5-6");

        layout1 = (LinearLayout) findViewById(R.id.layout1);
        layout2 = (LinearLayout) findViewById(R.id.layout2);
        layout3 = (LinearLayout) findViewById(R.id.layout3);
        layout4 = (LinearLayout) findViewById(R.id.layout4);

        layout1.setOnClickListener(new View.OnClickListener() {
            public void onClick(View v) {
                String str = Integer.toString(layout1.getWidth()) + " x "
                        + Integer.toString(layout1.getHeight());
                Toast.makeText(getApplicationContext(), str, Toast.LENGTH_SHORT).show();
            }
        });

        layout2.setOnClickListener(new View.OnClickListener() {
            public void onClick(View v) {
                String str = Integer.toString(layout2.getWidth()) + " x "
                        + Integer.toString(layout2.getHeight());
                Toast.makeText(getApplicationContext(), str, Toast.LENGTH_SHORT).show();
            }
        });

        layout3.setOnClickListener(new View.OnClickListener() {
            public void onClick(View v) {
                String str = Integer.toString(layout3.getWidth()) + " x "
                        + Integer.toString(layout3.getHeight());
                Toast.makeText(getApplicationContext(), str, Toast.LENGTH_SHORT).show();
            }
        });

        layout4.setOnClickListener(new View.OnClickListener() {
            public void onClick(View v) {
                String str = Integer.toString(layout4.getWidth()) + " x "
                        + Integer.toString(layout4.getHeight());
                Toast.makeText(getApplicationContext(), str, Toast.LENGTH_SHORT).show();
            }
        });

    }
}
- 7번 문제
- MainActivity.java
package com.example.ch4_layout5_7;

import androidx.appcompat.app.AppCompatActivity;
import android.graphics.Color;
import android.os.Bundle;
import android.widget.LinearLayout;

public class MainActivity extends AppCompatActivity {
    @Override
    public void onCreate(Bundle savedInstanceState) {
        super.onCreate(savedInstanceState);
        setTitle("연습문제 5-7");

        //자바코드로만  레이아웃 작성
        //param을 만들어 놓고
        LinearLayout.LayoutParams params = new LinearLayout.LayoutParams(
                LinearLayout.LayoutParams.MATCH_PARENT,
                LinearLayout.LayoutParams.MATCH_PARENT, 1);

        //레이아웃을 생성하고
        LinearLayout baseLayout = new LinearLayout(this);
        baseLayout.setOrientation(LinearLayout.VERTICAL);

        //레이아웃을 붙인다.
        baseLayout.setLayoutParams(params);

        LinearLayout upLayout = new LinearLayout(this);
        upLayout.setOrientation(LinearLayout.HORIZONTAL);
        upLayout.setLayoutParams(params);

        LinearLayout upLeft = new LinearLayout(this);
        upLeft.setLayoutParams(params);
        upLeft.setBackgroundColor(Color.RED);

        upLayout.addView(upLeft);

        LinearLayout upRight = new LinearLayout(this);
        upRight.setLayoutParams(params);
        upRight.setOrientation(LinearLayout.VERTICAL);

        upLayout.addView(upRight);

        LinearLayout upRight1 = new LinearLayout(this);
        upRight1.setLayoutParams(params);
        upRight1.setBackgroundColor(Color.YELLOW);

        LinearLayout upRight2 = new LinearLayout(this);
        upRight2.setLayoutParams(params);
        upRight2.setBackgroundColor(Color.BLACK);

        upRight.addView(upRight1);
        upRight.addView(upRight2);

        LinearLayout downLayout = new LinearLayout(this);
        downLayout.setLayoutParams(params);
        downLayout.setBackgroundColor(Color.BLUE);

        baseLayout.addView(upLayout);
        baseLayout.addView(downLayout);

        setContentView(baseLayout);

    }
}
4. 터치 이벤트
Ch3_App1_TouchProject 프로젝트 만들기
자바 소스로 터치 이벤트 구현
- MainActivity.java
package com.example.ch3_app1_touchproject;

import androidx.appcompat.app.AppCompatActivity;

import android.content.Context;
import android.graphics.Canvas;
import android.graphics.Color;
import android.graphics.Paint;
import android.os.Bundle;
import android.view.MotionEvent;
import android.view.View;

public class MainActivity extends AppCompatActivity {

    @Override
    protected void onCreate(Bundle savedInstanceState) {
        super.onCreate(savedInstanceState);
        //setContentView(R.layout.activity_main);
        //MyView 클래스 객체 생성하며 초기화
        MyView w = new MyView(this, 120, 500);
        //실행
        setContentView(w);
    }

}

/**
 * 커스텀 뷰생성 클래스
 */
class MyView extends View {

    //전역변수
    int x, y;
    Context context;

    /**
     * 전역변수 초기화 생성자
     * @param context
     * @param x
     * @param y
     */
    MyView(Context context, int x, int y) {
        super(context); //View 클래스에게
        this.context = context;
        this.x = x;
        this.y = y;
        setBackgroundColor(Color.rgb(245,245,220));
    }

    //터치 이벤트 추가
    int r,g,b;
    /**
     * 터치 이벤트 추가 메서드
     * @param event
     * @return
     */
    @Override
    public boolean onTouchEvent(MotionEvent event) {
        x = (int)event.getX();
        y = (int)event.getY();
        //랜덤함수로 색 만들기
        r = (int)(Math.random() * 255) + 1;
        g = (int)(Math.random() * 255) + 1;
        b = (int)(Math.random() * 255) + 1;
        invalidate(); //손가락으로 터치한 곳의 포인트 다시 그려준다.
        return super.onTouchEvent(event);
    }

    /**
     * 그래픽
     * @param canvas
     */
    @Override
    protected void onDraw(Canvas canvas) {
        super.onDraw(canvas);
        Paint paint1 = new Paint();
        Paint paint2 = new Paint();
        //원 그리기1
        paint1.setTextSize(30);
        paint1.setColor(Color.rgb(r, g, b));
        canvas.drawCircle(x, y, 50, paint1);
        //원 그리기2
        paint2.setColor(Color.rgb(r - 50, g - 50, b - 50));
        canvas.drawCircle(x, y, 40, paint2);
        //글자 및 쓰여지는 위치 지정
        canvas.drawText("(" + x + "," + y + ")에서 터치 이벤트가 발생되었습니다.", x, y + 100, paint1);
    }
}
5. 드래그 이벤트
Ch3_App2_ViewDrag 프로젝트 만들기
자바 소스로 드래그 이벤트 구현
- MainActivity.java
package com.example.ch3_app2_viewdrag;

import androidx.appcompat.app.AppCompatActivity;

import android.content.Context;
import android.graphics.Canvas;
import android.graphics.Color;
import android.graphics.Paint;
import android.os.Bundle;
import android.view.MotionEvent;
import android.view.View;

public class MainActivity extends AppCompatActivity {

    //전역 변수 초기화
    int x = 200, y = 300;
    String str;

    /**
     * 내부 클래스
     */
    protected class MyView extends View {

        /**
         * 생성자 초기화
         * @param context
         */
        MyView(Context context) {
            super(context);
            setBackgroundColor(Color.YELLOW);
        }

        /**
         * 그래픽
         * @param canvas
         */
        @Override
        protected void onDraw(Canvas canvas) {
            super.onDraw(canvas);
            Paint paint = new Paint();
            paint.setColor(Color.RED);
            canvas.drawCircle(x, y, 100, paint);
            paint.setTextSize(50);
            canvas.drawText("액션종류: " + str, 10, 50, paint);
        }

        /**
         * 터치이벤트 리스너 추가
         * @param event
         * @return true
         */
        @Override
        public boolean onTouchEvent(MotionEvent event) {
            x = (int)event.getX();
            y = (int)event.getY();
            if(event.getAction() == MotionEvent.ACTION_DOWN) {
                str = "Action Down";
            }
            if(event.getAction() == MotionEvent.ACTION_MOVE) {
                str = "Action Move";
            }
            if(event.getAction() == MotionEvent.ACTION_UP) {
                str = "Action Up";
            }
            invalidate();
            return true;
        }

    }

    @Override
    protected void onCreate(Bundle savedInstanceState) {
        super.onCreate(savedInstanceState);
        //setContentView(R.layout.activity_main);
        MyView w = new MyView(this);
        setContentView(w);
    }

}
내부 클래스 만들때 protected Class로 하여 메서드로 인식되지 않게 조심하기.
protected class 로 만들기.

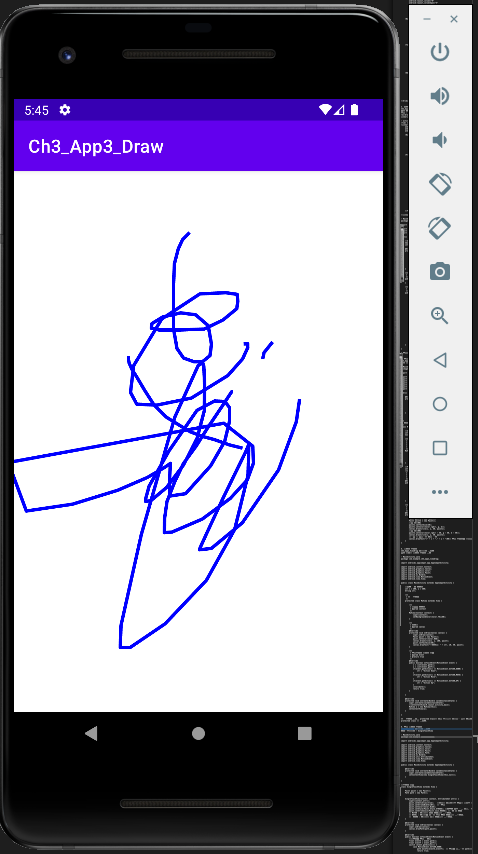
6. 터치 드래그 이벤트
Ch3_App3_Draw 프로젝트 만들기
커스텀컴포넌트 - SingleTouchView
- MainActivity.java
package com.example.ch3_app3_draw;

import androidx.appcompat.app.AppCompatActivity;

import android.content.Context;
import android.graphics.Canvas;
import android.graphics.Color;
import android.graphics.Paint;
import android.graphics.Path;
import android.os.Bundle;
import android.util.AttributeSet;
import android.view.MotionEvent;
import android.view.View;

public class MainActivity extends AppCompatActivity {

    @Override
    protected void onCreate(Bundle savedInstanceState) {
        super.onCreate(savedInstanceState);
        setContentView(new SingleTouchView(this,null));
    }

}

//클래스 생성
class SingleTouchView extends View {

    Paint paint = new Paint();
    Path path = new Path();

    SingleTouchView(Context context, AttributeSet attrs) {
        super(context,attrs);
        paint.setAntiAlias(true);   //인접한 스팩트럼이 겹쳐서 출력이 왜곡되는 현상을 계단 현상(에일리어싱, Aliasing),계단형식을 매끄럽게 처리
        paint.setStrokeWidth(10f);  //선두께
        paint.setColor(Color.BLUE);
        paint.setStyle(Paint.Style.STROKE); //채우기 없이 선만 그림, fill채우기
        paint.setStrokeJoin(Paint.Join.ROUND); //선의 끝 모양
        // MITER : 모서리를 각진 모양으로 만듭니다.
        // BEVEL : 모서리가 둥글게 살짝 깍인 모양으로 만듭니다.
        // ROUND : 모서리를 둥근 모양으로 만듭니다.
    }

    /**
     * 그래픽
     * @param canvas
     */
    @Override
    protected void onDraw(Canvas canvas) {
        super.onDraw(canvas);
        canvas.drawPath(path, paint);
    }

    /**
     * 이벤트 리스너
     * @param event
     * @return
     */
    @Override
    public boolean onTouchEvent(MotionEvent event) {
        //마우스가 터치될 위치
        float eventX = event.getX();
        float eventY = event.getY();
        switch (event.getAction()) {
            case MotionEvent.ACTION_DOWN:
                path.moveTo(eventX,eventY); //터치가 눌러지면 path(경로)에 위치를 저장한다
                return true;

            case MotionEvent.ACTION_MOVE:
                path.lineTo(eventX,eventY); //누르는 도중에 움직이면 경로에 직선그리기를 저장한다
                break;

            case MotionEvent.ACTION_UP:
                break;

            default:
                return false;
        }
        invalidate(); //새로 그려준다
        return true;
/*
  onTouchEvent()의 반환값
       이벤트에서
          . 반환값  true : 이벤트 처리를 완벽하게 했다는의미
                    false: 다른 메소드가 동일한 이벤트를 다시 처리하는 것을 허용하게 new 된다

        onTouchEvent()에서는 약간 미묘한 문제있다.
          . 반환값 false : 안드로이드는 현재의 이벤트가 완전히 처리되지 않는 것으로 판단하고
                           현재의 이벤트에 이어지는 ACTION_MOVE, ACTION_UP 이벤트는 없애버린다. (ACTION_DOWN은 미삭제함)
                           터치 이벤트의 특징상 상당히 많이 발생되므로 불가피하게 이렇게 처리한다.
                           따라서 터치이벤트에서  3가지 이벤트(MOVE,UP,DOWN)을 하고 싶다면 반드시 return true해야 한다.

*/
        // 과제: r,g,b 색상선택을 구현해 오시오. 지우기도 추가할 것
    }
}
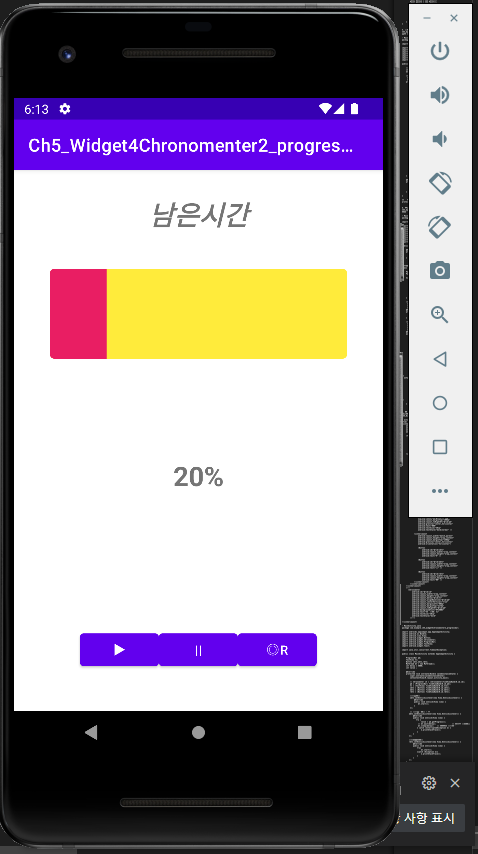
7. 뷰 컨테이너 : 프로그레스 바
Ch5_Widget4Chronomenter2_progressbar 프로젝트 만들기
- activity_main.xml
<?xml version="1.0" encoding="utf-8"?>
<LinearLayout xmlns:android="http://schemas.android.com/apk/res/android"
    android:orientation="vertical"
    android:layout_width="match_parent"
    android:layout_height="match_parent"
    android:layout_margin="30dp">

    <TextView
        android:id="@+id/tv1"
        android:layout_width="match_parent"
        android:layout_height="wrap_content"
        android:gravity="center_horizontal"
        android:text="남은시간"
        android:textSize="30sp"
        android:textStyle="bold|italic"/>

    <LinearLayout
        android:id="@+id/layout1"
        android:layout_width="match_parent"
        android:layout_height="match_parent"
        android:layout_marginTop="30dp"
        android:orientation="vertical">

        <ProgressBar
            android:id="@+id/pb"
            style="@android:style/Widget.ProgressBar.Horizontal"
            android:layout_width="match_parent"
            android:layout_height="100dp"
            android:layout_below="@+id/tv1"
            android:layout_margin="10dp"
            android:layout_marginTop="15dp"
            android:layout_marginBottom="15dp"
            android:indeterminate="false"
            android:max="100"
            android:progress="100"
            android:progressBackgroundTint="#FFEB3B"
            android:progressTint="#E91E63"
            android:rotation="0" />

        <LinearLayout
            android:layout_width="match_parent"
            android:layout_height="match_parent"
            android:orientation="vertical">

            <TextView
                android:id="@+id/tv2"
                android:layout_width="match_parent"
                android:layout_height="wrap_content"
                android:layout_marginLeft="0dp"
                android:layout_marginTop="100dp"
                android:layout_toRightOf="@+id/pb"
                android:gravity="center_horizontal"
                android:text="000"
                android:textSize="30sp"
                android:textStyle="bold|normal" />

            <LinearLayout
                android:layout_width="match_parent"
                android:layout_height="wrap_content"
                android:layout_marginTop="150dp"
                android:gravity="center_horizontal"
                android:orientation="horizontal">

                <Button
                    android:id="@+id/sbtn"
                    android:layout_width="wrap_content"
                    android:layout_height="wrap_content"
                    android:text="▶" />

                <Button
                    android:id="@+id/ebtn"
                    android:layout_width="wrap_content"
                    android:layout_height="wrap_content"
                    android:text="||" />

                <Button
                    android:id="@+id/rbtn"
                    android:layout_width="wrap_content"
                    android:layout_height="wrap_content"
                    android:text="◎R" />
            </LinearLayout>
        </LinearLayout>
    </LinearLayout>
    <!--
      <Chronometer
          android:id="@+id/cb"
          android:layout_width="wrap_content"
          android:layout_height="wrap_content"
          android:layout_below="@+id/tv"
          android:layout_alignBaseline="@+id/pb"
          android:layout_centerVertical="true"
          android:layout_marginLeft="80dp"
          android:layout_marginTop="217dp"
          android:layout_toRightOf="@+id/pb"
          android:backgroundTint="#F1EBB3"
          android:text="남은시간: %s"
          android:textSize="30sp"
          android:textStyle="bold"
        />-->

</LinearLayout>
- MainActivity.java
package com.example.ch5_widget4chronomenter2_progressbar;

import androidx.appcompat.app.AppCompatActivity;
import android.os.Bundle;
import android.view.View;
import android.widget.Button;
import android.widget.Chronometer;
import android.widget.ProgressBar;
import android.widget.TextView;
import android.widget.Toast;

import java.util.concurrent.TimeoutException;

public class MainActivity extends AppCompatActivity {

    ProgressBar pb;
    TextView tv;
    Button sbtn,ebtn,rbtn;
    MyThread mt = new MyThread();
    int delay = 5000;
    int value ;

    @Override
    protected void onCreate(Bundle savedInstanceState) {
        super.onCreate(savedInstanceState);
        setContentView(R.layout.activity_main);

        // Chronometer ch = (Chronometer)findViewById(R.id.cb);
        pb = (ProgressBar) findViewById(R.id.pb);
        tv = (TextView) findViewById(R.id.tv2);
        sbtn = (Button) findViewById(R.id.sbtn);
        ebtn = (Button) findViewById(R.id.ebtn);
        rbtn = (Button) findViewById(R.id.rbtn);

        //시작버튼
        sbtn.setOnClickListener(new View.OnClickListener() {
            @Override
            public void onClick(View view) {
                mt.start();
            }
        });

        // 일시중지버튼 - ??
       ebtn.setOnClickListener(new View.OnClickListener() {
           @Override
           public void onClick(View view) {
              try {
                   value = pb.getProgress();
                // mt.wait(delay);                // 화면이 꺼져버림
                mt.sleep(delay);   // 5초동안 일시정지
               } catch (InterruptedException e) {
                   e.printStackTrace();
               }
           }
       });

       //리스타트버튼
       rbtn.setOnClickListener(new View.OnClickListener() {
           @Override
           public void onClick(View view) {
               try{
                   mt.start();
               }catch (Exception e){
                   e.printStackTrace();
               }
           }
       });
    }

    public class MyThread extends Thread {

        public void run() {
            for(int i=0 ; i <= 100 ; i++) {
                tv.setText(Integer.toString(i)+"%");
                if(i==100){
                    tv.setText("종료!!");
                }
                pb.setProgress(i);
                try {
                    sleep(100);
                } catch (InterruptedException e) {
                    Toast.makeText(getApplicationContext(), "에러발생", Toast.LENGTH_LONG).show();
                }
            }
        }
    }
}
8. 뷰 컨테이너 : 날짜설정, 시간설정
Ch5_Widget7DateTimeReservation 프로젝트 만들기
- activity_main.xml
<?xml version="1.0" encoding="utf-8"?>
<LinearLayout xmlns:android="http://schemas.android.com/apk/res/android"
    android:orientation="vertical"
    android:layout_width="match_parent"
    android:layout_height="match_parent"
   >
    <LinearLayout
        android:orientation="vertical"
        android:layout_width="match_parent"
        android:layout_height="wrap_content"
        android:layout_marginTop="5dp">

        <Chronometer
            android:id="@+id/chronometer1"
            android:layout_width="wrap_content"
            android:layout_height="wrap_content"
            android:format="예약에 걸린 시간  %s"
            android:layout_gravity="center"
            android:textSize="20sp"/>
        <Button
            android:id="@+id/btnStart"
            android:layout_width="match_parent"
            android:layout_height="wrap_content"
            android:text="예약시작"
            android:textSize="16sp"/>
    </LinearLayout>

    <RadioGroup
        android:layout_width="match_parent"
        android:layout_height="wrap_content">

        <RadioButton
            android:id="@+id/rdoCal"
            android:layout_width="wrap_content"
            android:layout_height="wrap_content"
            android:text="날짜설정(캘린더 뷰)"/>
        <RadioButton
            android:id="@+id/rdoTime"
            android:layout_width="wrap_content"
            android:layout_height="wrap_content"
            android:text="시간설정"/>
    </RadioGroup>

    <LinearLayout
        android:layout_width="match_parent"
        android:layout_height="wrap_content">

        <FrameLayout
            android:layout_width="match_parent"
            android:layout_height="wrap_content">

            <CalendarView
                android:id="@+id/calendarView1"
                android:layout_width="match_parent"
                android:layout_height="wrap_content"
                android:showWeekNumber="false">
            </CalendarView>

            <TimePicker
                android:id="@+id/timePicker1"
                android:layout_width="match_parent"
                android:layout_height="355dp">

            </TimePicker>
        </FrameLayout>
    </LinearLayout>
    <LinearLayout
        android:background="#CCCCCC"
        android:orientation="horizontal"
        android:layout_width="match_parent"
        android:layout_height="wrap_content"
        android:baselineAligned="true"
        android:layout_marginTop="50dp">

        <Button
            android:id="@+id/btnEnd"
            android:layout_width="wrap_content"
            android:layout_height="wrap_content"
            android:text="예약완료"/>
        <TextView
        android:id="@+id/tvYear"
        android:layout_width="wrap_content"
        android:layout_height="wrap_content"
        android:text="0000"/>
        <TextView
            android:layout_width="wrap_content"
            android:layout_height="wrap_content"
            android:text="년"/>
        <TextView
            android:id="@+id/tvMonth"
            android:layout_width="wrap_content"
            android:layout_height="wrap_content"
            android:text="00"/>
        <TextView
            android:layout_width="wrap_content"
            android:layout_height="wrap_content"
            android:text="월"/>
        <TextView
            android:id="@+id/tvDay"
            android:layout_width="wrap_content"
            android:layout_height="wrap_content"
            android:text="00"/>
        <TextView
            android:layout_width="wrap_content"
            android:layout_height="wrap_content"
            android:text="일"/>
        <TextView
            android:id="@+id/tvHour"
            android:layout_width="wrap_content"
            android:layout_height="wrap_content"
            android:text="00"/>
        <TextView
            android:layout_width="wrap_content"
            android:layout_height="wrap_content"
            android:text="시"/>
        <TextView
            android:id="@+id/tvMinute"
            android:layout_width="wrap_content"
            android:layout_height="wrap_content"
            android:text="00"/>

        <TextView
            android:layout_width="wrap_content"
            android:layout_height="wrap_content"
            android:text="분 예약되었습니다" />
    </LinearLayout>

</LinearLayout>
- MainActivity.java
package com.example.ch5_widget7datetimereservation;

import androidx.appcompat.app.AppCompatActivity;

import android.graphics.Color;
import android.os.Bundle;
import android.os.SystemClock;
import android.view.View;
import android.widget.Button;
import android.widget.CalendarView;
import android.widget.Chronometer;
import android.widget.RadioButton;
import android.widget.TextView;
import android.widget.TimePicker;

public class MainActivity extends AppCompatActivity {

    //1. 필드변수 선언
    Chronometer chrono;
    Button btnStart, btnEnd;
    RadioButton rdoCal, rdoTime;
    CalendarView calView;
    TimePicker tPicker;
    TextView tvYear, tvMonth, tvDay, tvHour, tvMinute;

    int selectYear,selectDay,selectMonth;

    @Override
    protected void onCreate(Bundle savedInstanceState) {
        super.onCreate(savedInstanceState);
        setContentView(R.layout.activity_main);

        setTitle("시간예약");

        btnStart = (Button)findViewById(R.id.btnStart) ;
        btnEnd =(Button)findViewById(R.id.btnEnd);

        chrono = (Chronometer)findViewById(R.id.chronometer1);

        rdoCal = (RadioButton)findViewById(R.id.rdoCal);
        rdoTime= (RadioButton)findViewById(R.id.rdoTime);

        calView=(CalendarView)findViewById(R.id.calendarView1);
        tPicker=(TimePicker)findViewById(R.id.timePicker1);

        tvYear = (TextView)findViewById(R.id.tvYear);
        tvMonth= (TextView)findViewById(R.id.tvMonth);
        tvDay  = (TextView)findViewById(R.id.tvDay);
        tvHour =(TextView)findViewById(R.id.tvHour);
        tvMinute=(TextView)findViewById(R.id.tvMinute);

        tPicker.setVisibility(View.INVISIBLE);  // 타임피커를 보이지 않게 초기화
        calView.setVisibility(View.INVISIBLE);  // 캘린더뷰를 보이지 않게 초기화

        //캘린더 라디오버튼에 리스너 설정
        rdoCal.setOnClickListener(new View.OnClickListener(){
            @Override
            public void onClick(View view) {
                tPicker.setVisibility(View.INVISIBLE);//시간가려주고
                calView.setVisibility(View.VISIBLE);//달력은보여주고
            }
        });
        //타임 라디오버튼에 리스너 설정
        rdoTime.setOnClickListener(new View.OnClickListener(){

            @Override
            public void onClick(View view) {
                tPicker.setVisibility(View.VISIBLE); // 시간보여주고
                calView.setVisibility(View.INVISIBLE); //달력 가려주고
            }
        });

        //예약시작버튼에 리스너 설정
        btnStart.setOnClickListener(new View.OnClickListener(){

            @Override
            public void onClick(View view) {
                chrono.setBase(SystemClock.elapsedRealtime()); //예약시간을 누르면 크로노미터를 0으로 초기화
                chrono.start(); // 예약을 시작 --> 크로노미터를 시작한다.
                chrono.setTextColor(Color.RED); //글자색상 지정
            }
        });

        //예약완료버튼 리스너설정
        btnEnd.setOnClickListener(new View.OnClickListener(){

            @Override
            public void onClick(View view) {
                chrono.stop();
                chrono.setTextColor(Color.BLUE);

                String yy = (String)Integer.toString(selectYear);
                String mm = (String)Integer.toString(selectMonth);
                //예약완료옆에 년월일시분 을  출력해주는 문장 --> 정수타입의 select~필드를 문자로 형변환후 출력한다
                tvYear.setText(yy);
                tvMonth.setText(mm);
                tvDay.setText(Integer.toString(selectDay));

                tvHour.setText(Integer.toString(tPicker.getCurrentHour()));  // 타임피커에서 현재시간을 가져온다.
                tvMinute.setText(Integer.toString(tPicker.getCurrentMinute())); //타임피커에서 현재분을 가져온다
            }
        });
        //캘린더뷰에 날짜설정
        calView.setOnDateChangeListener(new CalendarView.OnDateChangeListener() {

            @Override
            public void onSelectedDayChange( CalendarView view, int year, int month, int dayOfMonth) {
                selectYear = year;
                selectMonth = month+1;
                selectDay= dayOfMonth;
            }
        });
    }
}
9. 스크롤 뷰
Ch3_App4_ScrollView 프로젝트 만들기
스크롤 뷰 : 딱 하나의 위젯만 넣을 수 있다.
<ScrollView> 태그 안에 <LinearLayout> 태그를 추가하여 이 안에 여러개 넣는 식으로 해야 한다.
혹은 <ScrollView> 태그 안에 <HorizontalScrollView> 안에 <LinearLayout> 태그를 추가하는 식
- activity_main.xml
<?xml version="1.0" encoding="utf-8"?>
<LinearLayout xmlns:android="http://schemas.android.com/apk/res/android"
    android:layout_width="match_parent"
    android:layout_height="match_parent"
    android:orientation="vertical">

    <ScrollView
        android:layout_width="match_parent"
        android:layout_height="match_parent">
        <HorizontalScrollView
            android:layout_width="match_parent"
            android:layout_height="match_parent">
            <LinearLayout
                android:layout_width="match_parent"
                android:layout_height="match_parent"
        </HorizontalScrollView>

    </ScrollView>

</LinearLayout>
10. 슬라이딩 드로어 - 서랍
Ch3_App5_SlidingDrawer 프로젝트 만들기
핸들과 컨텐트가 한 쌍이 되는 것이 핵심이다.
- activity_main.xml
<?xml version="1.0" encoding="utf-8"?>
<LinearLayout xmlns:android="http://schemas.android.com/apk/res/android"
    android:layout_width="match_parent"
    android:layout_height="match_parent"
    android:orientation="vertical">

    <TextView
        android:layout_width="wrap_content"
        android:layout_height="wrap_content"
        android:text="서랍 밖입니다"/>

    <SlidingDrawer
        android:layout_width="match_parent"
        android:layout_height="match_parent"
        android:handle="@+id/handle"
        android:content="@+id/content">
        <Button
            android:id="@+id/handle"
            android:layout_width="wrap_content"
            android:layout_height="wrap_content"
            android:text="핸들"/>
        <LinearLayout
            android:id="@+id/content"
            android:layout_width="match_parent"
            android:layout_height="match_parent"
            android:orientation="vertical"/>
    </SlidingDrawer>

</LinearLayout>
11. 뷰플리퍼
Ch3_App6_ViewFlipper 프로젝트 만들기
뷰플리퍼 : 겹쳐져 있는 것
※ 주요 메서드
showNext() : 다음 페이지
showPreview() : 이전 페이지
startFlipping : 화면 넘김 시작
setFlipInterval(1000) : 시간간격
res/drawable 폴더에 사진 파일 4개 넣기(mov05.jpg, mov24.jpg, mov32.jpg, mov51.jpg)
weight 속성으로 똑같이 맞출 수 있다. 합계/각 숫자
- activity_main.xml
<?xml version="1.0" encoding="utf-8"?>
<LinearLayout xmlns:android="http://schemas.android.com/apk/res/android"
    android:layout_width="match_parent"
    android:layout_height="match_parent"
    android:orientation="vertical">

    <LinearLayout
        android:layout_width="match_parent"
        android:layout_height="wrap_content"
        android:orientation="horizontal">
        <Button
            android:id="@+id/btnStart"
            android:layout_width="wrap_content"
            android:layout_height="wrap_content"
            android:layout_weight="1"
            android:text="START"/>
        <Button
            android:id="@+id/btnStop"
            android:layout_width="wrap_content"
            android:layout_height="wrap_content"
            android:layout_weight="1"
            android:text="STOP"/>
    </LinearLayout>

    <ViewFlipper
        android:id="@+id/viewFliper1"
        android:layout_width="match_parent"
        android:layout_height="match_parent">
        <ImageView
            android:layout_width="match_parent"
            android:layout_height="match_parent"
            android:src="@drawable/mov05"
            android:scaleType="fitXY"/>
        <LinearLayout
            android:layout_width="match_parent"
            android:layout_height="match_parent"
            android:background="#ff6200"
            android:gravity="center">
            <TextView
                android:layout_width="wrap_content"
                android:layout_height="wrap_content"
                android:text="첫 번째"
                android:textSize="20dp"/>
        </LinearLayout>
        <ImageView
            android:layout_width="match_parent"
            android:layout_height="match_parent"
            android:src="@drawable/mov24"
            android:scaleType="fitXY"/>
        <LinearLayout
            android:layout_width="match_parent"
            android:layout_height="match_parent"
            android:background="#ff6200"
            android:gravity="center">
            <TextView
                android:layout_width="wrap_content"
                android:layout_height="wrap_content"
                android:text="두 번째"
                android:textSize="20dp"/>
        </LinearLayout>
    </ViewFlipper>

</LinearLayout>
- MainActivity.java
package com.example.ch3_app6_viewflipper;

import androidx.appcompat.app.AppCompatActivity;

import android.os.Bundle;
import android.view.View;
import android.widget.Button;
import android.widget.ViewFlipper;

public class MainActivity extends AppCompatActivity {

    //전역 변수
    Button btnStart, btnStop;
    ViewFlipper vf;

    @Override
    protected void onCreate(Bundle savedInstanceState) {
        super.onCreate(savedInstanceState);
        setContentView(R.layout.activity_main);
        //xml에서 가져온 객체
        btnStart = (Button)findViewById(R.id.btnStart);
        btnStop = (Button)findViewById(R.id.btnStop);
        vf = (ViewFlipper)findViewById(R.id.viewFliper1);
        //리스너 부착
        btnStart.setOnClickListener(new View.OnClickListener() {
            @Override
            public void onClick(View view) {
                //vf.showNext(); //다음 화면 직접 넘김(수동)
                vf.startFlipping(); //화면 전환 시작
                vf.setFlipInterval(1000); //전환 간격
            }
        });
        btnStop.setOnClickListener(new View.OnClickListener() {
            @Override
            public void onClick(View view) {
                vf.stopFlipping(); //화면 멈춤
            }
        });
    }

}
'교육 정리 > 안드로이드 앱 제작(Java)' 카테고리의 다른 글
| 6일차. 데이터 저장과 관리2, 파일, 서비스, 브로드캐스트, 프로바이더, 맵 (2) | 2022.11.12 |
|---|---|
| 5일차. 프래그먼트, 어댑터뷰, 리사이클러, 뷰 페이저, 액티비티와 인텐트, 데이터 저장과 관리 (0) | 2022.11.05 |
| 4일차. 그래픽과 이미지 (3) | 2022.10.29 |
| 2일차. 레이아웃 익히기, 고급위젯 다루기 (3) | 2022.10.08 |
| 1일차. 안드로이드의 개요와 개발환경 설치, 안드로이드 애플리케이션, Java 문법, 기본 위젯 익히기 (0) | 2022.10.01 |


댓글